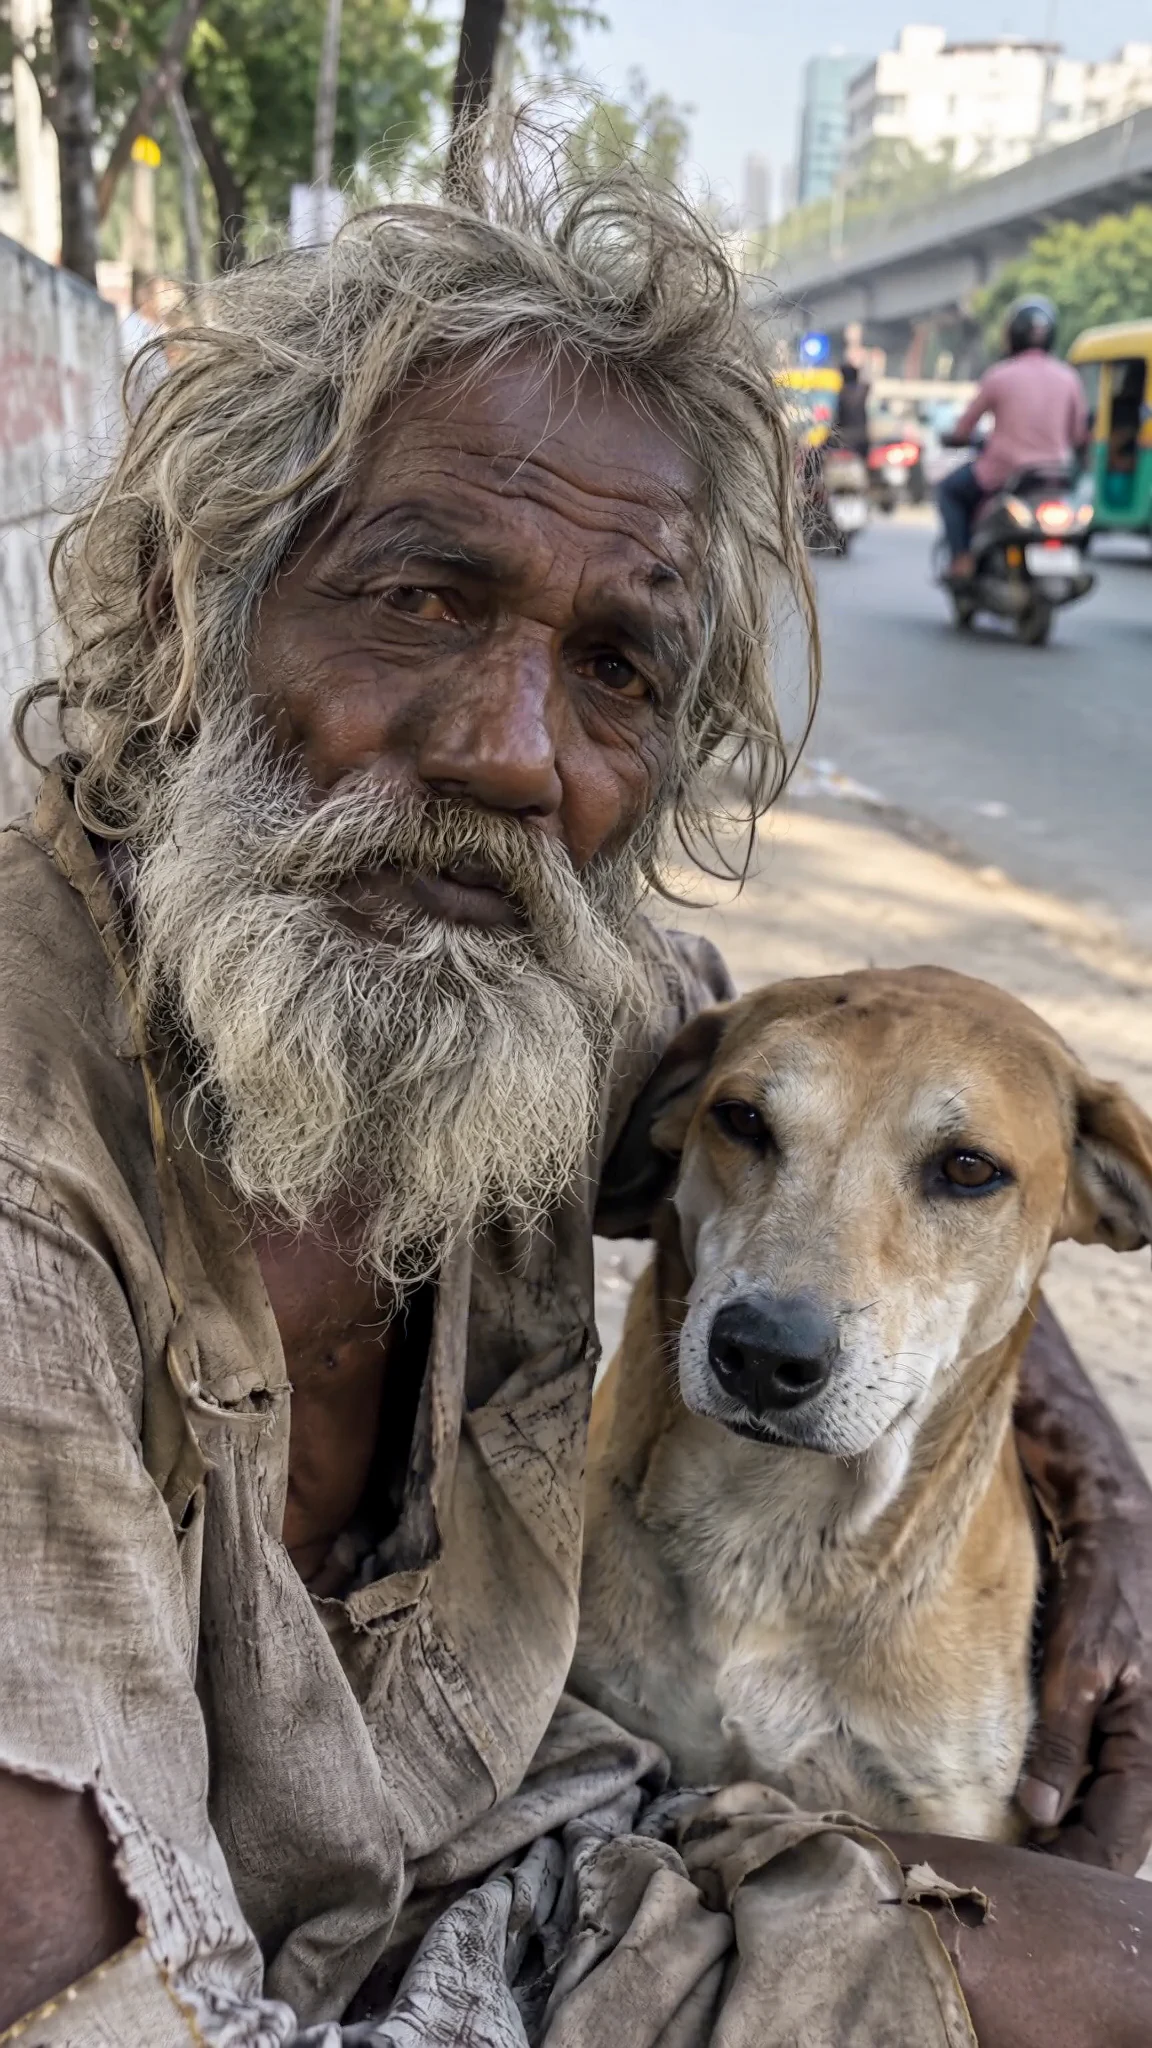
Keeping the same face across generated images can be frustrating. In this MiniMax H3 ComfyUI reference to image tutorial, I’ll show how I used a reference-to-video model to save a still portrait while preserving the reference identity.
The trick is simple: request the shortest sequence, decode it, and save its first frame. I tested this on my RTX 5080 with 16 GB VRAM, using no custom nodes. My 1152×2048 result took about 176 seconds at 20 steps. The face identity was essentially identical to the reference, although the output also copied its framing. I’ll show that limitation alongside the setup, exact prompt, wiring, and free workflow download.
What is MiniMax H3 ref2va (and why use it for images)?
Reference-to-video + audio in one model
MiniMax H3 ref2va is a reference-to-video(+audio) model. Here, I’m using its reference conditioning for a still image. The workflow retains the model’s video and audio VAE inputs, even though the final output is a PNG.
This is useful when you want to experiment with a consistent face from a reference photo without adding a character LoRA. My test used no LoRA; it is a practical example, not a promise that every reference or prompt will behave identically.
The single-frame trick in one sentence
Set length = 5, decode, select frame 0 with ImageFromBatch, and save with SaveImage.
MiniMaxH3ReferenceToVideo: length = 5
VAEDecode → ImageFromBatch: batch_index = 0, length = 1 → SaveImage
Lengths follow the 17k + 5 grid at 24 fps, so the minimum request is 5, not 1. This is a minimum-length video request, followed by single-frame extraction. The core MiniMax H3 node source defines the length setting. The extraction node limits the saved output to one still.
Requirements
Tested setup (ComfyUI version, frontend, templates, PyTorch, GPU)
These are the versions and hardware I used:
GPU: NVIDIA RTX 5080, 16 GB VRAM
ComfyUI: 0.38.1
ComfyUI frontend: 1.53.6
Workflow templates: 0.11.73
PyTorch: 2.11 + cu130
Use the official ComfyUI repository and ComfyUI documentation for installation and update guidance appropriate to your setup.
VRAM and disk space
My test used about 9–11 GB VRAM on a 16 GB card. Smaller cards were not tested. My recorded test-download estimate was about 40.5 GB; current repository file sizes may differ. Check your available storage before downloading.
No custom nodes needed
All nodes in this workflow are core ComfyUI nodes. The MiniMax H3 integration is in:
comfy_extras.nodes_minimax_h3If the MiniMax node is missing, check your ComfyUI version before searching for a third-party node pack.
Download the MiniMax H3 models
Which file goes in which folder
Download the files from Comfy-Org/MiniMax-H3 on Hugging Face. Keep each filename unchanged so it matches the supplied workflow.
| ComfyUI folder | Required file | Approximate size in my test |
|---|---|---|
ComfyUI/models/diffusion_models/ |
minimax_h3_ref2va_pruned_int8_convrot.safetensors |
21 GB |
ComfyUI/models/text_encoders/ |
qwen3vl_32b_minimax_h3_nvfp4_awq.safetensors |
15.7 GB |
ComfyUI/models/vae/ |
minimax_h3_video_vae_int8_convrot.safetensors |
3.2 GB |
ComfyUI/models/vae/ |
minimax_h3_audio_vae_fp32.safetensors |
0.6 GB |
These are the approximate sizes recorded for my test; repository file sizes may differ. Check the model license, including territorial and commercial-use conditions, before use or distribution.
Once the downloads finish, refresh the model lists or restart ComfyUI. Check every loader before queueing; a missing file or the wrong subfolder can prevent the workflow from running.
Optional turbo LoRAs
Turbo LoRAs are optional and go in ComfyUI/models/loras/. I did not use them in this test or evaluate their still-image quality. Start with the settings below to reproduce my workflow before experimenting.
Start from the official template (video_minimax_h3_r2v)
Look for the MiniMax H3 reference-to-video template in ComfyUI’s template browser. Its file is:
video_minimax_h3_r2v.jsonThe official workflow-templates repository is the source to check if your installed templates do not show it. Keep a copy of the original video graph before adapting its output branch.
You can also use my download below. It is an API-format JSON export, so import behavior depends on your frontend. If your installation does not reconstruct it, build the graph from the wiring table rather than treating the file as a guaranteed visual-workflow import.
Build the MiniMax H3 ComfyUI reference to image workflow step by step
Step 1: Load the model, text encoder and both VAEs
Add UNETLoader, CLIPLoader, and two VAELoader nodes. Select the corresponding files from the models table. Use these loader settings:
UNETLoader: weight_dtype = default
CLIPLoader: type = minimax, device = default
Keep the video VAE and audio VAE separate. The reference node needs both; the image decoder later uses the video VAE.
Step 2: Load your reference images
Add two LoadImage nodes. Connect the identity photo first and the scene photo second:
LoadImage (identity) → ref_images.ref_image_0 → <Picture 1>
LoadImage (scene) → ref_images.ref_image_1 → <Picture 2>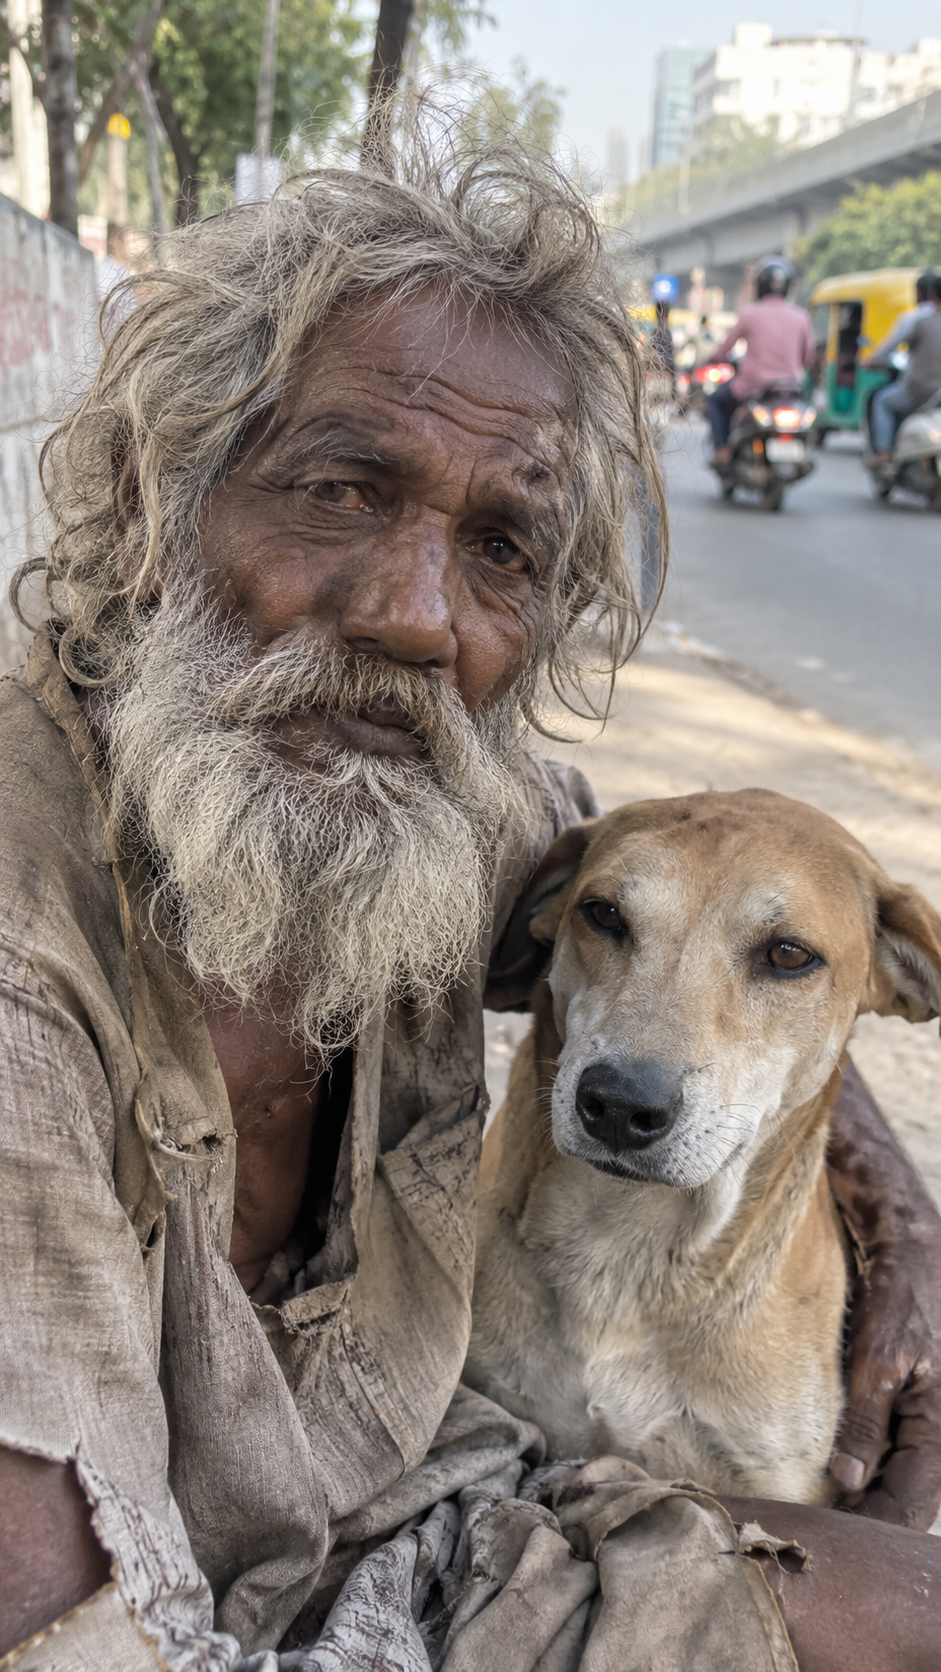
<Picture 1>): the identity reference for face, hair and beard. View original PNG.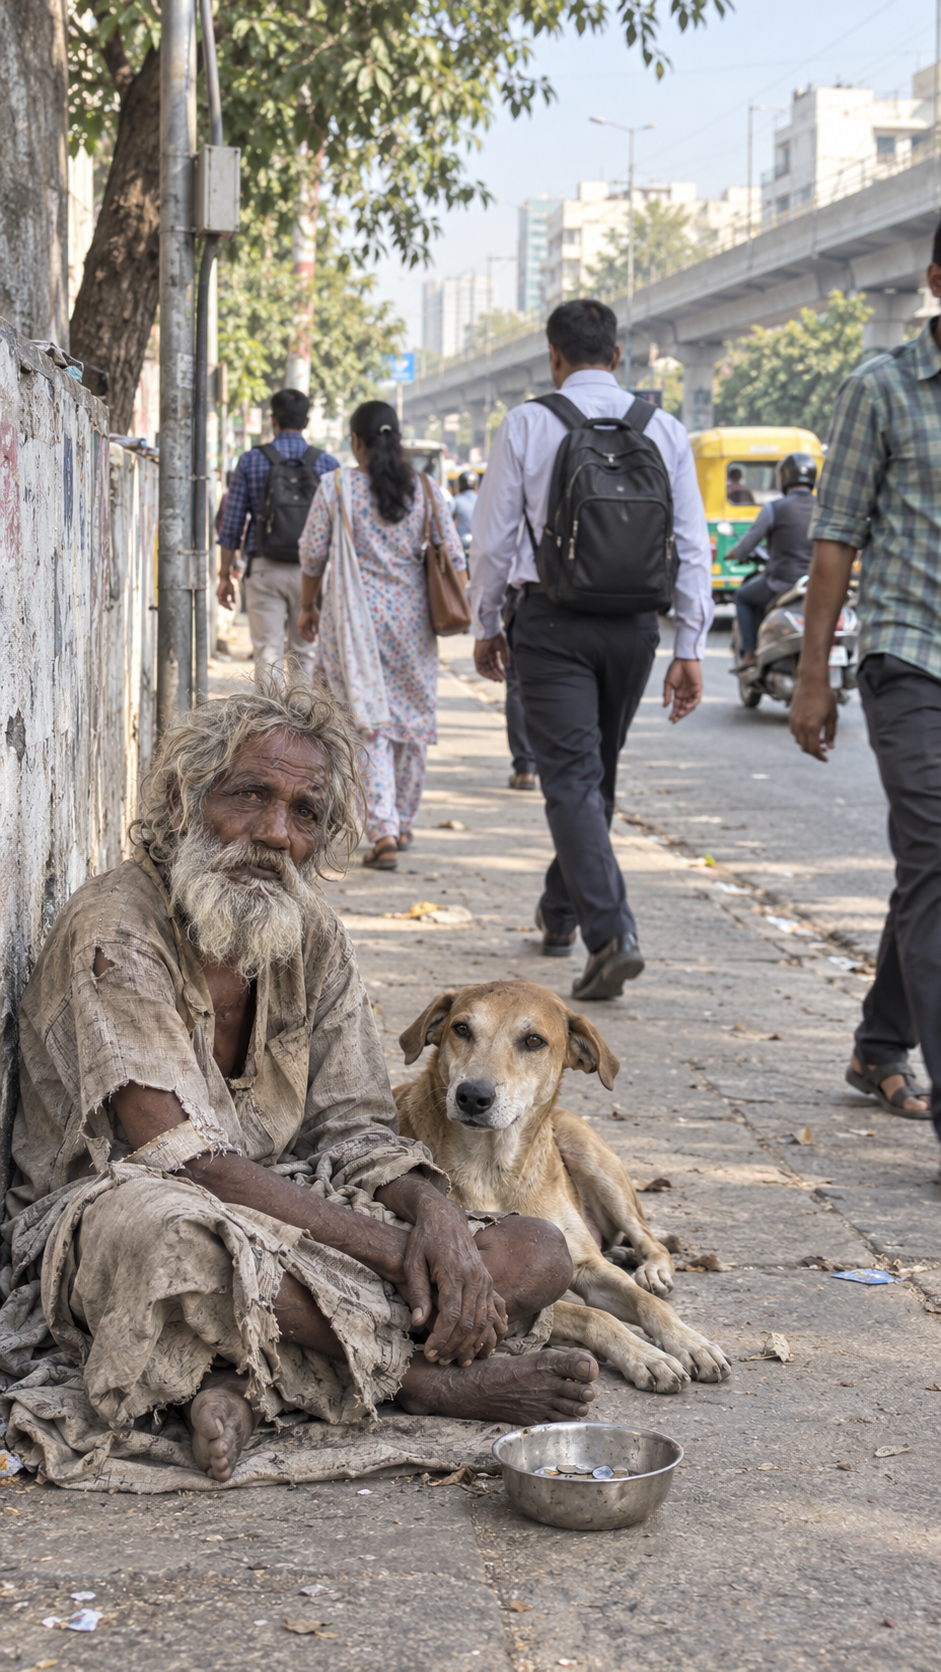
<Picture 2>): the scene/setting reference. View original PNG.The download uses sample filenames. Select your own images in both loaders; the JSON does not include the reference photos. Choose photos you have permission to use.
Step 3: Configure MiniMaxH3ReferenceToVideo
Connect the text encoder, video VAE, and audio VAE to their matching inputs. Set:
width = 1152
height = 2048
length = 5
ref_image_size = match
Width and height must be multiples of 32. I used match for reference-image sizing in this test. The node offers nine image slots, three reference-video slots, and reference-audio inputs; this example uses only the two image references.
Step 4: Sampler setup
Use BasicGuider, KSamplerSelect, BasicScheduler, RandomNoise, and SamplerCustomAdvanced. Connect the model to both the guider and scheduler.
The reference node’s conditioning output is slot 0; its latent output is slot 1. These go to the guider’s conditioning input and the sampler’s latent input respectively. Use the following complete wiring to check your graph.
| Node | Settings and connections |
|---|---|
1. UNETLoader |
unet_name = minimax_h3_ref2va_pruned_int8_convrot.safetensors; weight_dtype = default |
2. CLIPLoader |
clip_name = qwen3vl_32b_minimax_h3_nvfp4_awq.safetensors; type = minimax; device = default |
3. VAELoader |
vae_name = minimax_h3_video_vae_int8_convrot.safetensors |
4. VAELoader |
vae_name = minimax_h3_audio_vae_fp32.safetensors |
5. LoadImage |
Identity reference → ref_images.ref_image_0 |
6. LoadImage |
Scene reference → ref_images.ref_image_1 |
7. MiniMaxH3ReferenceToVideo |
clip ← 2; vae ← 3; audio_vae ← 4; ref_image_0 ← 5; ref_image_1 ← 6; width = 1152; height = 2048; length = 5; ref_image_size = match; tested prompt below |
8. BasicGuider |
model ← 1; conditioning ← 7[0] |
9. KSamplerSelect |
sampler_name = res_multistep |
10. BasicScheduler |
model ← 1; scheduler = beta; steps = 20; denoise = 1.0 |
11. RandomNoise |
noise_seed = 777 |
12. SamplerCustomAdvanced |
noise ← 11; guider ← 8; sampler ← 9; sigmas ← 10; latent_image ← 7[1] |
13. VAEDecode |
samples ← 12[0]; vae ← 3 |
14. ImageFromBatch |
image ← 13; batch_index = 0; length = 1 |
15. SaveImage |
images ← 14; filename_prefix = minimax_h3/ref2image |
Step 5: Decode and grab one frame with ImageFromBatch
Connect the sampler output to VAEDecode and use the video VAE. Send the decoded images into ImageFromBatch:
batch_index = 0
length = 1
Do not confuse this extraction length with the generation length. The reference node requests the minimum sequence; this node chooses the first decoded image.
Step 6: SaveImage instead of SaveVideo
Connect the extracted image to SaveImage. My downloadable graph uses:
filename_prefix = minimax_h3/ref2imageThe still-image path ends here. The official video path instead uses audio decoding and video assembly through VAEDecodeAudio, CreateVideo, and SaveVideo.
Writing prompts with <Picture 1>, <Picture 2> tags
Tag order = connection order
Tags refer to the connected slots, not image filenames. State what each reference controls: identity, scene, or another visual feature. Reference videos and audio use <Video 1> and <Audio 1>.
Example prompt (copy-paste)
This is the exact prompt from my test:
Photorealistic candid photograph, India. <Picture 1> defines the old man's face, hair, beard and identity exactly. <Picture 2> defines the street setting. The same old man sits on the dusty sidewalk of a busy Indian street in front of a small barber salon, leaning against its wall, a street dog resting beside him, looking straight into the camera with tired kind eyes, natural daylight, shallow depth of field, sharp detail on skin, beard and worn clothes, shot on a phone cameraTips to get a new pose and scene
With ref_image_size = match, the model leans heavily on the reference layout and pose. To get a new scene, ask for a clearly different pose and setting and connect only the identity reference.
If you disconnect the scene reference, remove its tag and instructions from the prompt too. Describe the desired scene directly. The output is sensitive to prompt wording, so small changes can matter. Compare the composition as well as the face when reviewing results.
Recommended settings (cheat sheet table)
These are my tested settings, not a universal preset for every GPU or reference:
| Setting | Tested value |
|---|---|
| Resolution | 1152 × 2048; width/height must be multiples of 32 |
length |
5 (minimum-length sequence) |
| Sampler | res_multistep |
| Scheduler | beta |
| Steps | 20 |
| Denoise | 1.0 |
| Guider | BasicGuider |
| Seed | 777 |
| LoRA | None |
ref_image_size |
match (the reference-sizing mode used in this test) |
Results and performance on an RTX 5080 (16 GB)
1152×2048 test
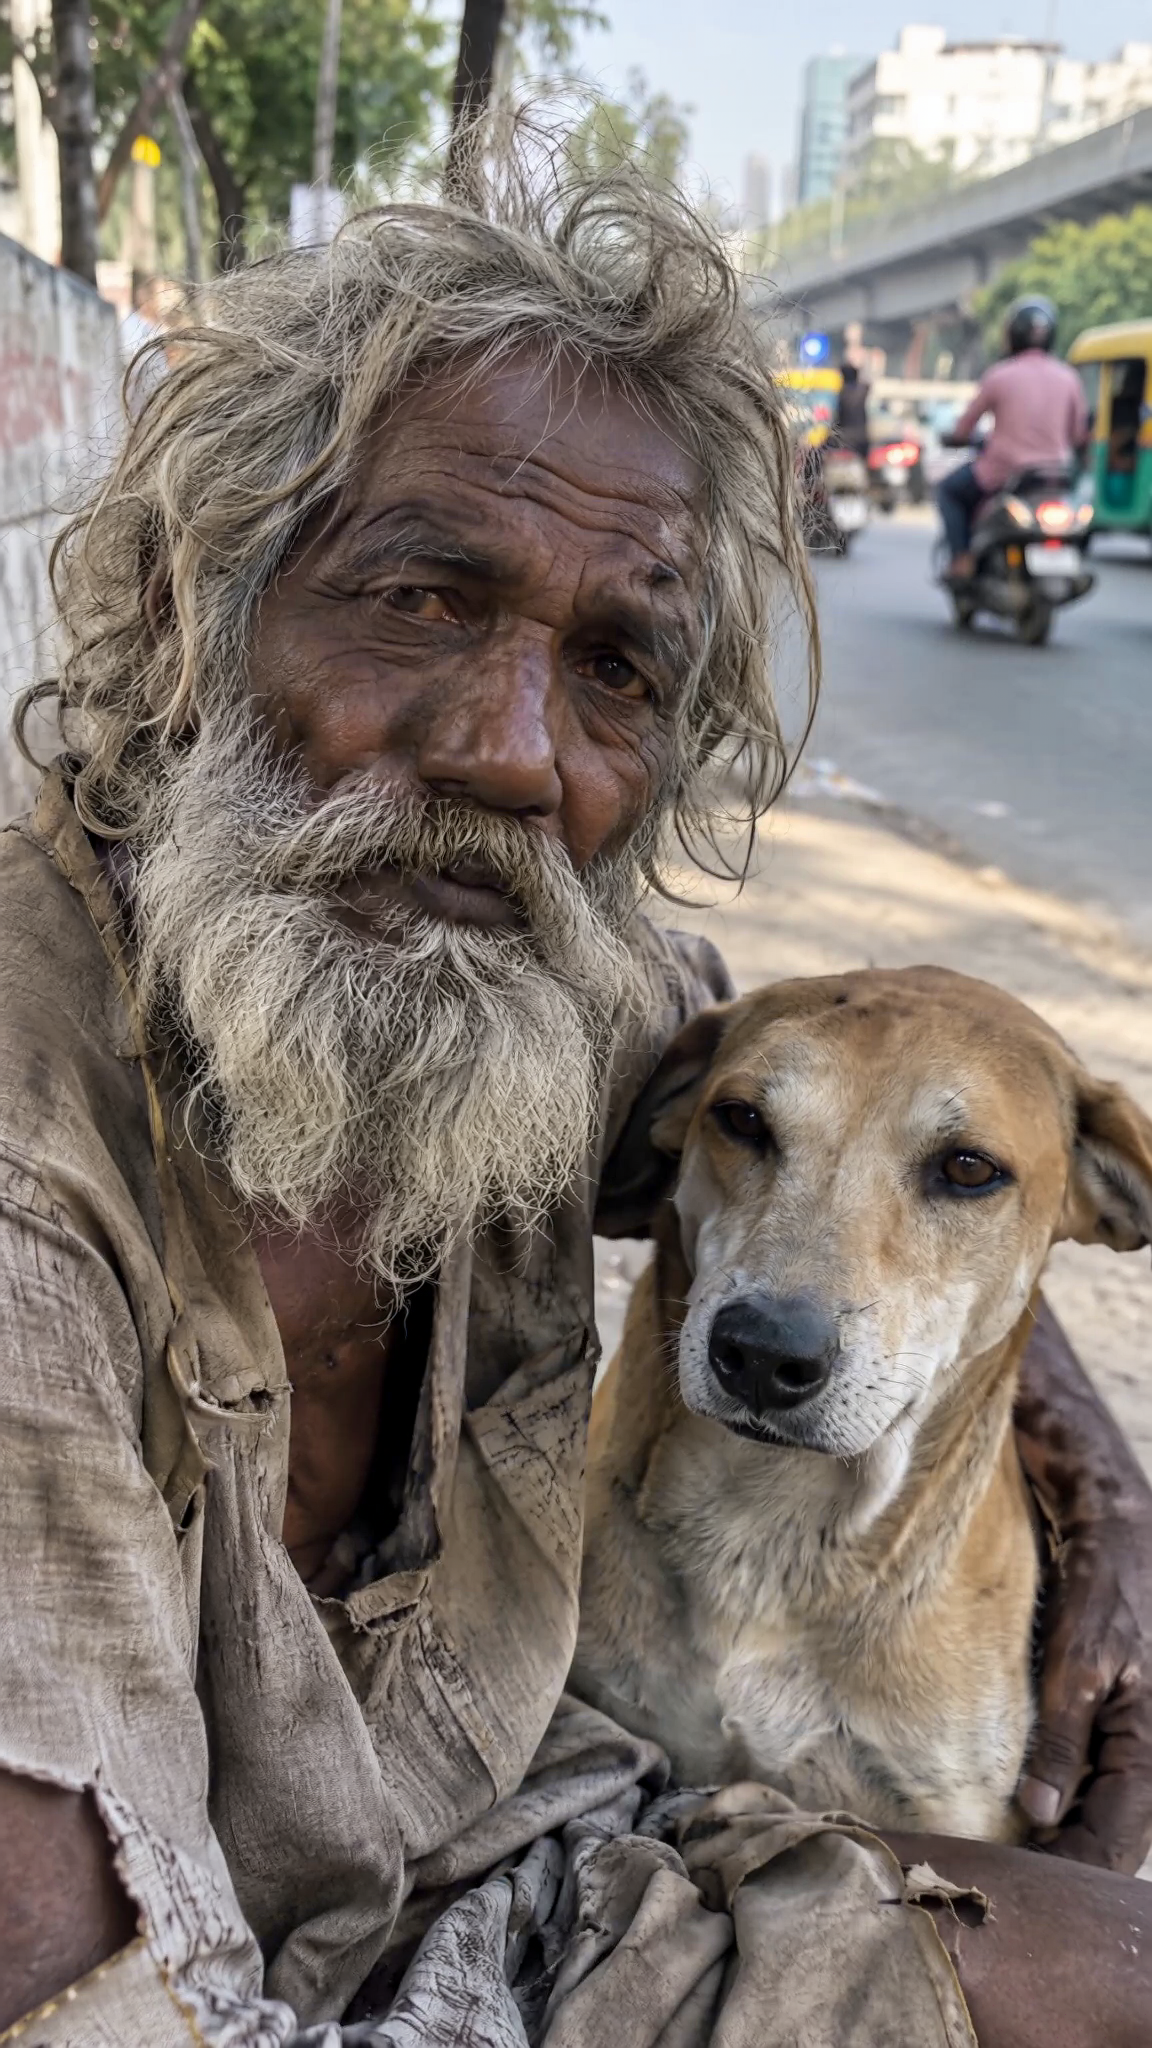
My 1152×2048 frame took about 176 seconds at 20 steps with ref_image_size = match. VRAM use was about 9–11 GB. Face identity was essentially identical to the reference.
The side-by-side comparison also shows an important problem: the result kept the reference’s close-up framing with the dog and street behind, instead of the requested scene of the man sitting in front of a barber salon.
For this example, identity preservation worked better than scene obedience. Treat the timing and memory figures as observations from my setup, not performance guarantees for another machine.
Higher-resolution 4K portrait test
In a second test on the same RTX 5080, my 4K portrait settings were 2144×3808, ref_image_size = max, and 30 steps. That run took about 375 s and reached about 13 GB peak VRAM. I kept length = 5 and saved frame 0 with ImageFromBatch; the saved output was a single still image.
These are separate observed runs with different resolution, reference sizing, and step count. They do not isolate the speed or memory effect of any one setting. The images shown above are from the 1152×2048 test.
Limitations you should know
- Copies the reference pose/layout. With
ref_image_size = match, the model leans heavily on the reference composition. My first test reproduced the reference framing instead of the requested scene. Fix: ask for a clearly different pose/setting in the prompt and connect only the identity reference when you want a new scene. - Generation takes time. My test with
matchtook about 176 s per 1152×2048 frame on an RTX 5080. The higher-resolution test used different settings, so these runs do not establish a speed comparison between reference-sizing modes. - Only tested on a 16 GB card. The 1152×2048 test used 9–11 GB on a 16 GB card, and the 2144×3808 test reached about 13 GB peak. Smaller cards were not tested, so I cannot claim they work.
- Big download. My approximate test-download estimate was 40.5 GB (21 + 15.7 + 3.2 + 0.6 GB); current repository file sizes may differ.
- Sensitive to prompt wording. Small wording changes can change the result. Expect to iterate.
- It’s a video model used for stills. One frame per run. Turbo LoRAs exist but were not tested for image quality in this guide.
Troubleshooting
- Node not found or red nodes: update ComfyUI to
0.38.1or newer. The MiniMax H3 nodes are core in that version. - Model missing from a loader: check the filename and correct
models/subfolder, then refresh or restart. - Text encoder errors: confirm
CLIPLoaderhastype = minimax. - Video or multiple saved frames: check generation
length = 5and extractionbatch_index = 0, length = 1. The final output node should beSaveImage. - Resolution errors or odd crops: use width and height that are multiples of
32. - Reference pose copied: change the pose/setting wording and use only the identity image.
- Too slow: my timing applies only to the tested settings. The two measured runs change several settings, and I did not benchmark the optional turbo LoRAs, so I cannot promise a speedup or the same image quality.
Download the free workflow JSON
⬇ Download the free MiniMax H3 reference-to-image workflow (ZIP containing JSON)
The download is a ZIP containing the cleaned API-format JSON export. WordPress does not accept the raw JSON upload. The JSON stores the API graph rather than the original canvas layout. It contains the node inputs and connections, with no client_id wrapper. The tested frontend version supports API JSON loading and reconstructs the graph. Import behavior and layout can differ in other UI versions.
- Download the ZIP and extract minimax_h3_ref2va_image_workflow_api.json first.
- Try dragging the JSON into ComfyUI if your frontend supports API-format import. Otherwise, start from the official template and reconstruct the graph using the wiring table above.
- Choose your own images in the two
LoadImagenodes. Replace the sample selectionsreference_identity.pngandreference_scene.png. - Check that all model filenames match your downloads, edit the prompt, verify the settings, and press Queue.
After a successful import or manual reconstruction, save a normal visual workflow from your own ComfyUI installation for later reuse.
FAQ
Can MiniMax H3 generate still images in ComfyUI?
Yes. MiniMax H3 ref2va is a reference-to-video model. Set length to 5 for the minimum-length sequence, decode it, pick frame 0 with ImageFromBatch, and save it with SaveImage.
Do I need custom nodes for the MiniMax H3 workflow?
No. This workflow uses core ComfyUI nodes, including the MiniMax H3 integration from comfy_extras.nodes_minimax_h3. I tested on ComfyUI 0.38.1 with frontend 1.53.6.
How much VRAM does MiniMax H3 need for a 1152×2048 image?
In my test on an RTX 5080 it used about 9–11 GB of VRAM, so it fits on a 16 GB card. I did not test smaller cards.
How long does one image take?
About 176 seconds for one 1152×2048 frame at 20 steps on an RTX 5080 with ref_image_size set to match.
How do I refer to my reference images in the prompt?
Use tags in the order the images are connected: <Picture 1> for ref_image_0, <Picture 2> for ref_image_1, and so on. Reference videos and audio use <Video 1> and <Audio 1>.
How many reference images can I use?
The MiniMaxH3ReferenceToVideo node has 9 image slots (ref_image_0 to ref_image_8), 3 reference video slots (0–2), plus reference audio inputs.
Why does my output copy the pose of the reference photo?
With ref_image_size = match the model leans heavily on the reference layout and pose. Ask for a clearly different pose and setting in the prompt, and use only the identity reference when you want a new scene.
What resolution should I use?
Width and height must be multiples of 32. I used 1152×2048 (portrait) with ref_image_size set to match.
Where do I download the MiniMax H3 models?
From the Comfy-Org/MiniMax-H3 repository on Hugging Face (https://huggingface.co/Comfy-Org/MiniMax-H3). File names and folders are listed in the models table above.
Can I make a video with the same workflow?
Yes. Raise length (lengths follow the 17k+5 grid at 24 fps, e.g. 5, 22, 39), then use the video-output branch from the official video_minimax_h3_r2v.json template instead of ImageFromBatch/SaveImage: decode the video with VAEDecode, decode audio with VAEDecodeAudio, combine them in CreateVideo, and save with SaveVideo.
Conclusion
The MiniMax H3 ref2va single-frame trick gives me a practical way to turn reference photos into a still image using core ComfyUI nodes. Start with the tested setup, keep the extraction settings correct, and inspect both identity and composition before calling a result successful.
Try the free workflow and share your results or questions in the comments. Subscribe to Freakyjolly for more practical ComfyUI workflows.
For related workflows, see my local AI video models roundup.