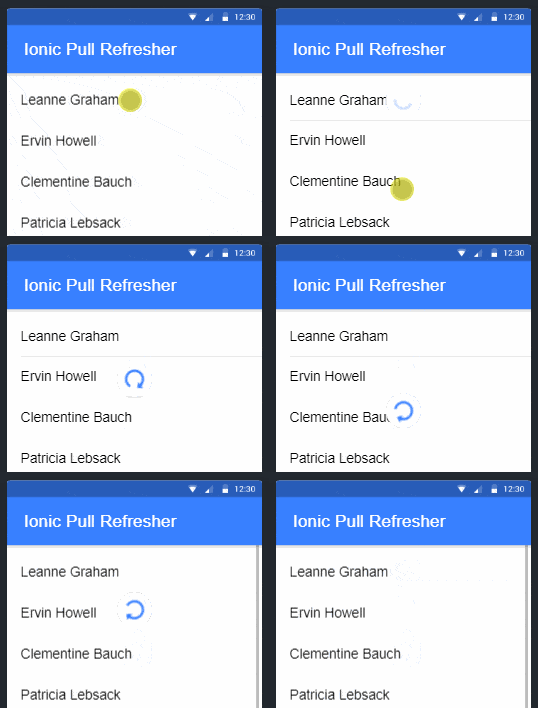
In this Ionic 5/4 tutorial, we’ll discuss pull or swipe down the page to refresh functionality in Ionic Angular application using the UI components available in the Ionic framework.
As seen in many Android native applications like chrome browser we usually have a user-friendly feature to pull down the page to refresh. A user just pulls or simply drag the page down to some limit then release, this acts like a an event handler to trigger some methods using which we can refresh the data on the page. Pull to refresh feature eliminates any need to tap or click somewhere.
This is a must-have feature in modern applications as most of the user tries to pull down the page to refresh something.. I personally do on some apps which even don’t provide such a feature 🙂
In the Ionic framework, we can easily implement the page refresher functionally by adding the combination of ion-refresher and ion-refresher-content components.
Let’s implement and discuss all configuration by building a real example application
[lwptoc]
Install or Update the Ionic CLI
You can install r update the existing Ionic CLI to the latest version by running below command
$ npm install -g @ionic/cli
Create an Ionic Application
Run the following command to create a new Ionic Angular application with a blank template
$ ionic start ionic-pull-refresher-app blank --type=angularMove inside the application folder
$ cd ionic-pull-refresher-app
Adding Refresher on Ionic Page
In the component template, we add the ion-refresher and ion-refresher-content within. The ion-refresher has the (ionRefresh) event handler, which is triggered when the user pulls the page down.
<ion-content [fullscreen]="true">

  <ion-refresher slot="fixed" (ionRefresh)="getUsersList($event)">
    <ion-refresher-content></ion-refresher-content>
  </ion-refresher>

  <ion-list>
    <ion-item *ngFor="let user of usersList">
      <ion-label>{{user.name}}</ion-label>
    </ion-item>
  </ion-list>

</ion-content>
Below the ion-refresher component, we have a list of names of users which is created using the ion-list and iterated of the collection of Users using *ngFor directive. We are going to fetch the User list using the Http get() method.
Update the Component class
In the home.page.ts file place following code
// home.page.ts
import { Component } from '@angular/core';
import { HttpClient } from '@angular/common/http';

@Component({
  selector: 'app-home',
  templateUrl: 'home.page.html',
  styleUrls: ['home.page.scss'],
})
export class HomePage {

  usersList = [];

  constructor(
    private http: HttpClient
  ) { }

  ngOnInit() {
    this.getUsersList(null)
  }

  getUsersList(event) {
    return this.http
      .get<any>('https://jsonplaceholder.typicode.com/users')
      .subscribe(response => {
        this.usersList = response;

        if (event)
          event.target.complete();
      }, error => {
        console.log(error);

        if (event)
          event.target.complete();
      })
  }

}
In the class, we will define the getUsersList() which is fetching the users’ data from a server. If you notice in the template, we passed $event inside out method, this will be used to call complete() method after call complete to hide the spinner loader.
We are calling the getUsersList() method on page load inside the ngOnInit() hook and also from (ionRefresh) event inside the template.
There is if(event) condition to run the event.target.complete() only when the method is fired from the pull event.
Events on ion-refresher
Following are the event available, other than (ionRefresh) we used above
(ionPull): Emitted while the user is pulling down the content and exposing the refresher.(ionRefresh): Emitted when the user lets go of the content and has pulled down further than the'pullMin'or pulls the content down and exceeds thepullMax.Updates the refresher state to ‘refreshing’. The'complete()'method should be called when the async operation has completed.(ionStart): Emitted when the user begins to start pulling down.
Properties on ion-refresher
closeDuration: Time it takes to close the refresher.disabled: If true, the refresher will be hidden.pullFactor: How much to multiply the pull speed by.pullMax: The maximum distance of the pull until the refresher will automatically go into the refreshing state.pullMin: The minimum distance the user must pull down until the refresher will go into the refreshing state.snapbackDuration: Time it takes the refresher to snap back to the refreshing state. It does not apply when the refresher content uses a spinner, enabling the native refresher.
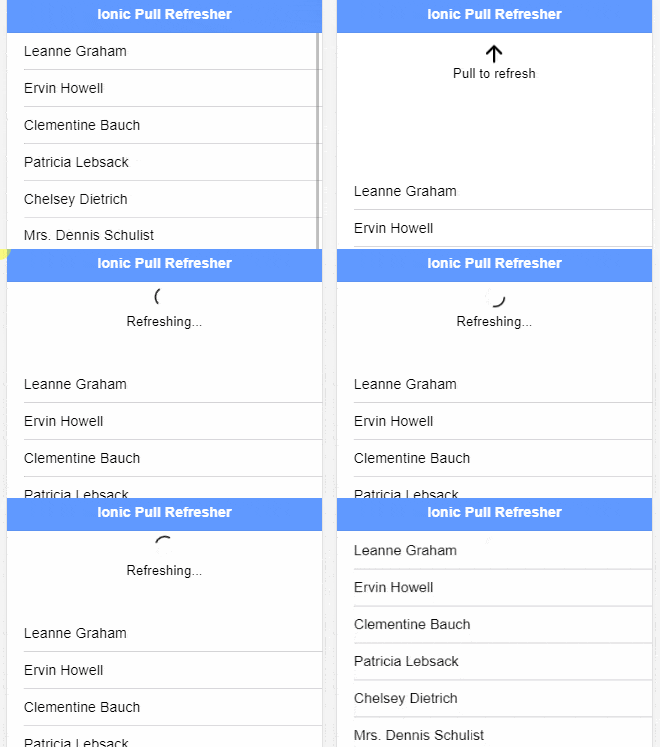
How to Change Spinner Icon to Pull Refresh?
The ion-refresher-content support multiple properties to modify the spinner icon. The refreshingSpinner property takes the name of the spinner to show during pull progress
<ion-content [fullscreen]="true">

  <ion-refresher slot="fixed" (ionRefresh)="getUsersList($event)" pullMin="100" pullMax="200">
    <ion-refresher-content
      pullingIcon="arrow-down-outline"
      pullingText="Pull to refresh"
      refreshingSpinner="crescent"
      refreshingText="Refreshing...">
    </ion-refresher-content>
  </ion-refresher>

  <ion-list>
    <ion-item *ngFor="let user of usersList">
      <ion-label>{{user.name}}</ion-label>
    </ion-item>
  </ion-list>

</ion-content>
Properties on ion-refresher-content
pullingIcon: A static icon or a spinner to display when you begin to pull down. A spinner name can be provided to gradually show tick marks when pulling down on iOS devices.<strong>pullingText</strong>: The text you want to display when you begin to pull down.pullingTextcan accept either plaintext or HTML as a string. To display characters normally reserved for HTML, they must be escaped. For example <Ionic> would become <Ionic><strong>refreshingSpinner</strong>: An animated SVG spinner that shows when refreshing begins. Type"bubbles"|"circles"|"circular"|"crescent"|"dots"|"lines"|"lines-small"| null | undefined<strong>refreshingText</strong>: The text you want to display when performing a refresh. refreshingText can accept either plaintext or HTML as a string.
Conclusion
That’s it we have implemented pull to refresh functionally in the Ionic application and also discussed how to use it with a real HTTP server get() call. We also discussed how to modify and customize it using properties available on the component.
Do share your feedback in the comment section. Thanks.


Leave a Reply