In this Angular tutorial, we’ll discuss how to enable live reload features in the Angular project using Hot Module Replacement ( HMR ) technique to see live changes without loading the complete application during development.
During normal development of an Angular project, when we save a change, the application is recompiled to re-build and paint the views, loading modules, CSS, etc again and again even if we do a small change in any file.
This process consumes a lot of time to reflect a minor change on screen as development bundles take much time then production builds to load in the web-browsers.
[lwptoc]
What is Hot Module Replacement (HMR)?
Hot Module Replacement (HMR) is a Webpack feature to update the application modules without reloading and repainting everything.
By using the HMR technique the application development becomes faster as fewer resources are loaded after saving the changes in the project.
To implement the HMR feature in the Angular project, we create a separate environment file then enable it by making a few changes in the initializing files. Check more details on official Webpack docs.
Let’s start by creating a new Angular project. You can skip this step if already have an Angular project up and running.
Create a New Angular Application
Run following ng command to create a new Angular project
$ ng new angular-hmr-app
# ? Would you like to add Angular routing? Yes
# ? Which stylesheet format would you like to use? CSS
Enter the project directory
$ cd angular-hmr-appOpen app in VS Code
$ code .
Now we have an Angular project ready to implement HMR feature. If you already have a project just proceed from here.
Implement Hot Module Replacement (HMR)
By default, an Angular project is created by two environment files for development and others for production. Here we are going to create one more environment file for HMR.
# Configure Project Environments
Create a new file ‘~src/environments/environment.hmr.ts’ and update with the following:
export const environment = {
    production: false,
    hmr: true
};
Update the ‘~src/environments/environment.ts’ file and add hmr: false
export const environment = {
  production: false,
  hmr: false
};
Update the ‘~src/environments/environment.prod.ts’ file and add hmr: false
export const environment = {
  production: true,
  hmr: false
};
# Update the angular.json file
Now update the angular.json file having NG CLI configurations. We need to add configurations to enable hmr during the serve and build.
Open the angular.json file and make changes in the "configurations" properties for "build" and "serve" by adding "hmr"
"build": {
    "configurations": {
      ...
      "hmr": {
        "fileReplacements": [
          {
            "replace": "src/environments/environment.ts",
            "with": "src/environments/environment.hmr.ts"
          }
        ]
      }
    }
  },
  ...
  "serve": {
    "configurations": {
      ...
      "hmr": {
        "hmr": true,
        "browserTarget": "angular-hmr-app:build:hmr"
      }
    }
  }
Note: Change “angular-hmr-app” with your app name.
# Update tsconfig.app.json
Open the ‘~src/tsconfig.app.json’ then add types
...
{
  ...
  "compilerOptions": {
    ...
    "types": ["node"]
  },
}
# Install @angularclass/hmr
To make our project compatible with HMR, we need to install dependencies. Run the following command to install the @angularclass/hmr module as a development dependency.
$ npm install --save-dev @angularclass/hmr
Next, create a file ‘~src/hmr.ts’ then update with below code:
// src/hmr.ts
import { NgModuleRef, ApplicationRef } from '@angular/core';
import { createNewHosts } from '@angularclass/hmr';

export const hmrBootstrap = (module: any, bootstrap: () => Promise<NgModuleRef<any>>) => {
  let ngModule: NgModuleRef<any>;
  module.hot.accept();
  bootstrap().then(mod => ngModule = mod);
  module.hot.dispose(() => {
    const appRef: ApplicationRef = ngModule.injector.get(ApplicationRef);
    const elements = appRef.components.map(c => c.location.nativeElement);
    const makeVisible = createNewHosts(elements);
    ngModule.destroy();
    makeVisible();
  });
};
# Update main.ts file
We need to change the bootstrap process by updating the ‘~src/main.ts’ file by including the hmr.ts file we just created in the above step.
// main.ts
import { enableProdMode } from '@angular/core';
import { platformBrowserDynamic } from '@angular/platform-browser-dynamic';

import { AppModule } from './app/app.module';
import { environment } from './environments/environment';

import { hmrBootstrap } from './hmr';

if (environment.production) {
  enableProdMode();
}

const bootstrap = () => platformBrowserDynamic().bootstrapModule(AppModule);

if (environment.hmr) {
  if (module[ 'hot' ]) {
    hmrBootstrap(module, bootstrap);
  } else {
    console.error('HMR is not enabled for webpack-dev-server!');
    console.log('Are you using the --hmr flag for ng serve?');
  }
} else {
  bootstrap().catch(err => console.log(err));
}
# Serve Project with HMR
To serve the project with HMR run $ ng serve with --configuration hmr option flag.
We can also update the package.json file’s “scripts” property with following
...
"scripts": {
  ...
  "hmr": "ng serve --open --configuration hmr"
}
Now just hit following in the terminal to serve the project with hmr
$ npm run hmrThe terminal window will display the following message which confirms that application is going to serve with HMR
NOTICE Hot Module Replacement (HMR) is enabled for the dev server.That’s it. Let’s check what is the difference while we serve with and without HMR.
Error Aler: If you see an error like this “An unhandled exception occurred: Configuration ‘hmr’ is not set in the workspace.”
Then it can be an issue be changes in the angular.json file. Double-check if you have placed the "hmr" object under "configurations"
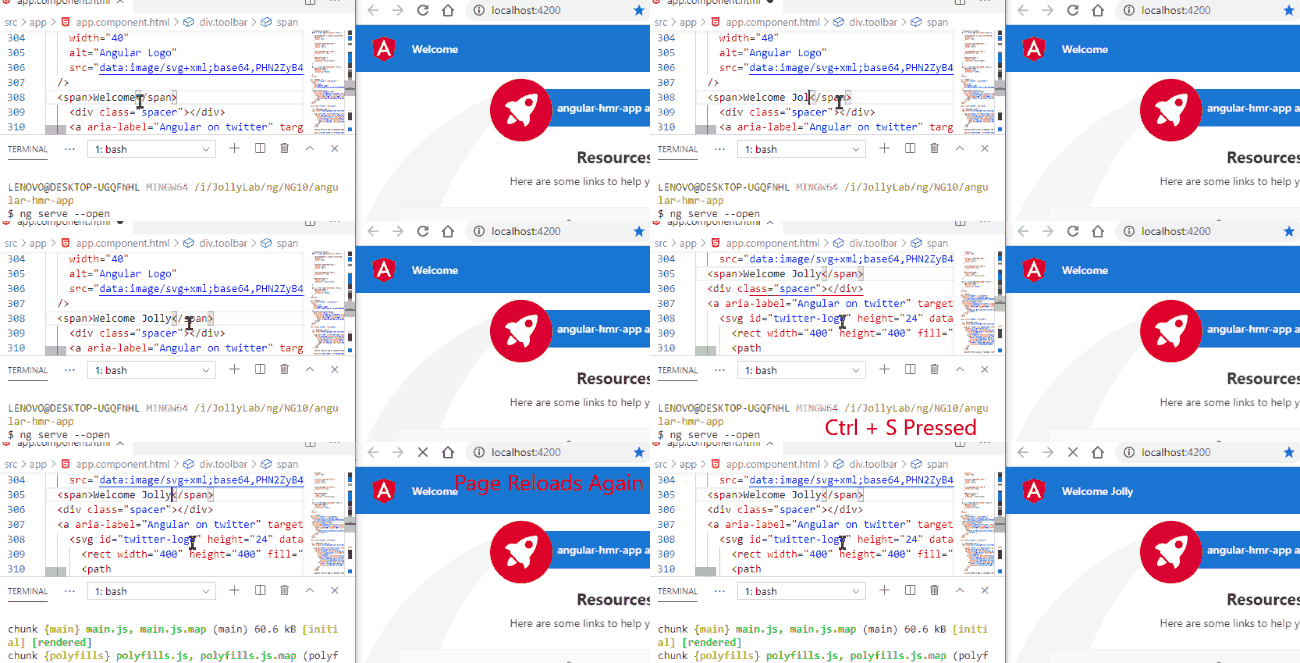
Serve Angular Project Without HMR
Hit $ ng serve --open to run the project without HMR
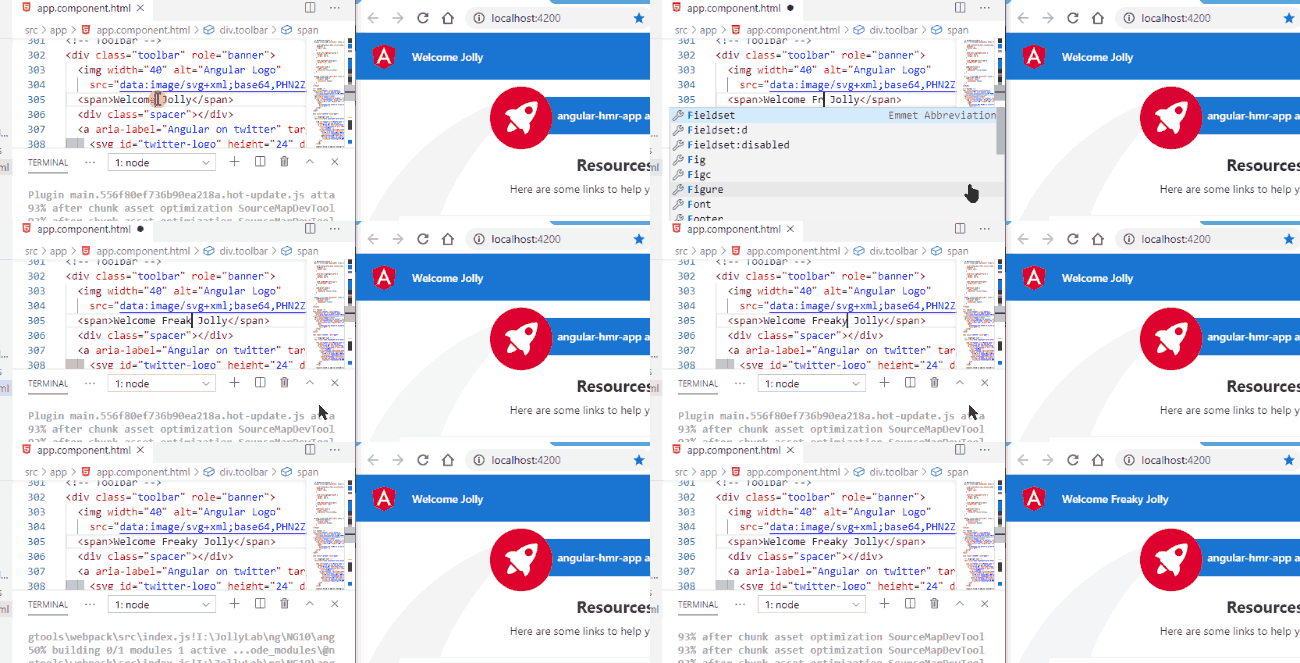
Serve Angular Project With HMR
Hit $ npm run hmr to run the project with HMR
Conclusion
By implementing the Hot Module Replacement technique we can save much time spent during the development phase. It is one of the most important features provided by Webpack.
In the above tutorial, we tried to explain steps to quickly implement HMR in the new and already built up projects.
Do share your feedback regarding HMR in the comment section.


Leave a Reply