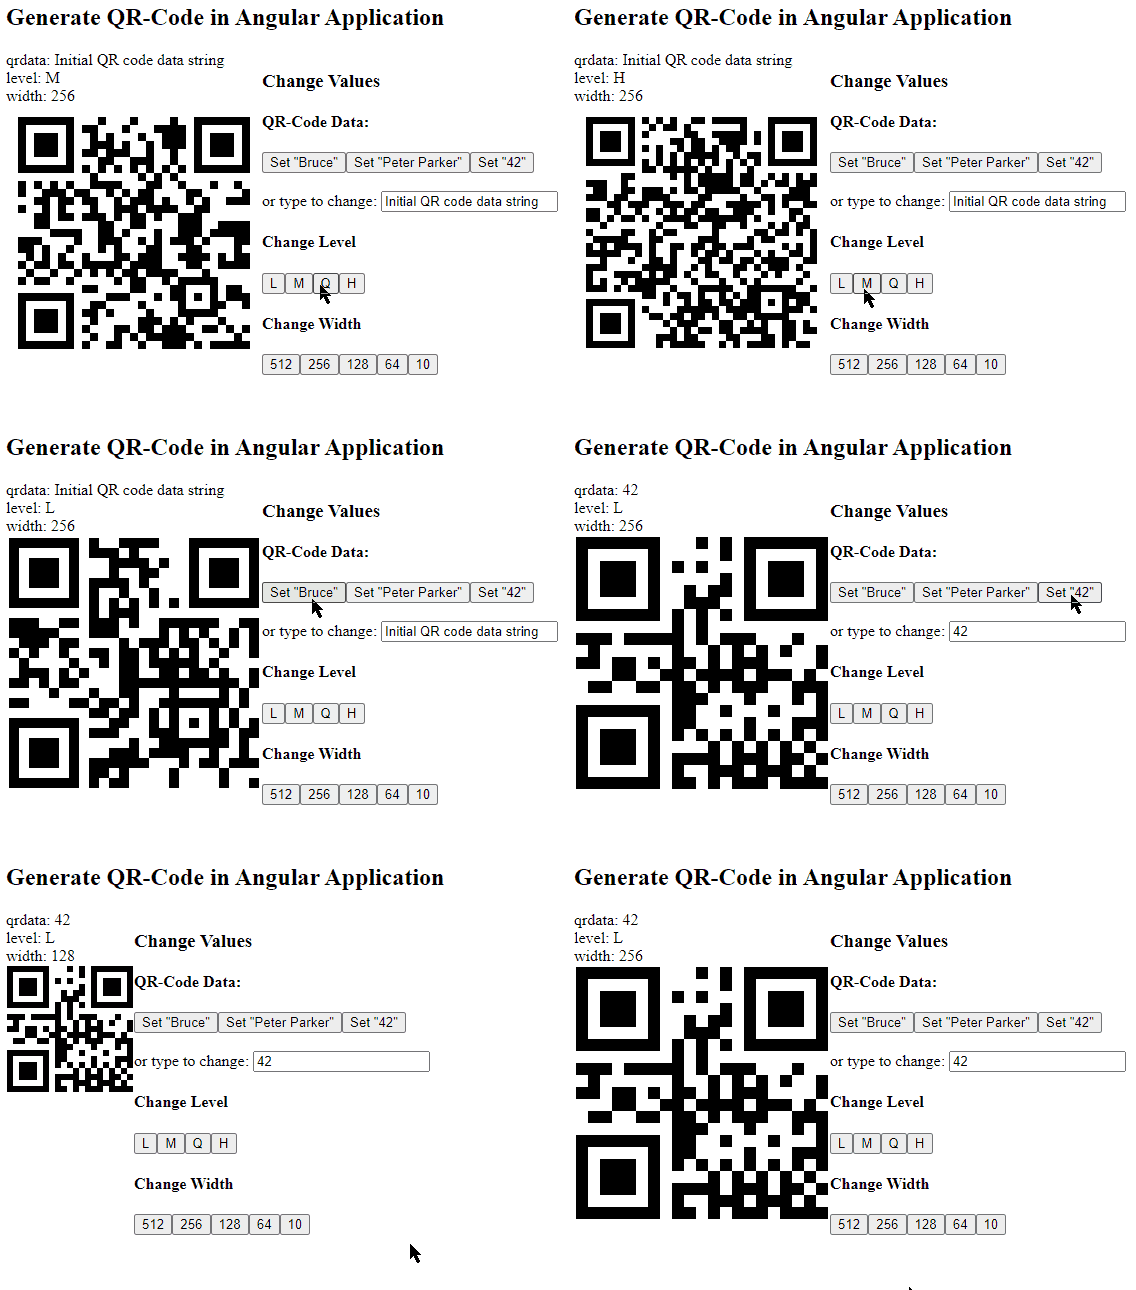
In this Angular tutorial, we’ll learn how to implement a QR Code generator in Angular 10/9/8/7/6/5/4 application by using the angular2-qrcode package module.
QR codes can be used for many real-world applications like sharing of data, location, product info, etc. These can be quickly scanned to reveal the encoded information. QR codes are square encoded patters that cannot be read by the naked eye.
There are a number of applications available to read these generated QR codes for Android, iOS, Windows etc.
In this article, we’re going to create Angular application in which a user can fill any textual information which can be converted into QR code
Let’s get started!
[lwptoc]
Setup Angular CLI
First, install or update the Angular CLI tool to the latest version by running the below NPM command
$ npm install -g @angular/cliYou can check the version of Angular currently installed
$ ng --version
Create a New Angular Application
Run following ng command to create a new Angular project
$ ng new angular-qr-code-tutorial
# ? Would you like to add Angular routing? Yes
# ? Which stylesheet format would you like to use? CSS
Enter the project directory
$ cd angular-qr-code-tutorialRun the application
$ ng serve --open
Install the angular2-qrcode Package
Run following NPM command to install the angular2-qrcode package in Angular project
$ npm install angular2-qrcode --save
Update App Module
After installing the package, import QRCodeModule to use the QR code generation methods. Also, import the FormsModule to use input form control in the tutorial to enter custom text.
Now update the app.module.ts file to import the required modules.
// app.module.ts
import { BrowserModule } from '@angular/platform-browser';
import { NgModule } from '@angular/core';

import { AppRoutingModule } from './app-routing.module';
import { AppComponent } from './app.component';

import { FormsModule } from '@angular/forms'
import { QRCodeModule } from 'angular2-qrcode';

@NgModule({
  declarations: [
    AppComponent
  ],
  imports: [
    BrowserModule,
    AppRoutingModule,
    FormsModule,
    QRCodeModule
  ],
  providers: [],
  bootstrap: [AppComponent]
})
export class AppModule { }
Adding a QR Code Generator
The QR code is generated by adding the <qr-code/> component in the template.
<qr-code [value]="'https://www.freakyjolly.com/'"></qr-code>The [value] property takes the text to generate the QR code.
Let’s discuss some important properties available before we complete the application.
Properties for QR Code
Following are the properties available on the <qr-code/> component directive:
value: Data in the form of string to generate QR Code.size: Height and Width of your QR Code component in PX. Default is 100level:QR Error Correction level (‘L’, ‘M’, ‘Q’, ‘H’). Default is ‘L’background: The color for the background. Default is ‘white’backgroundAlpha: The opacity of the background. Default is 1.0foreground: The color for the foreground. Default is ‘black’foregroundAlpha: The opacity of the foreground. Default is 1.0mime: The mime type for the output image. Default is ‘image/png’padding: The padding around the QR Code. Default is nullcanvas: Will output a canvas element if true. Default is false
Configure Colors of QR Code
The foreground and background properties can have custom colors to generate different color codes.
<qr-code
    [value]="'https://www.freakyjolly.com/'"
    background="#9DD0FF"
    foreground="#0084FF"
    size="200"
  >
</qr-code>
Adding JSON Object in QR Code
To add a JSON object in QR Code, we need to first convert it into a string then pass in the QR code value property.
data = [{
    'name': 'Jolly',
    'address': 'Mars',
    'email': 'example@abc.com'
  }]

  dataString = JSON.stringify(this.data);
<qr-code [value]="dataString" size="200"></qr-code>
Creating QR-Code Generation Application in Angular
Now we’ll quickly create an Angular application in which you can try to change various properties of the QR code component.
Update Template
<h2>Generate QR-Code in Angular Application</h2>
<div class="flexContainer">
  <div>
    <div>
      <div>qrdata: {{ qrdata }}</div>
      <div>level: {{ level }}</div>
      <div>width: {{ width }}</div>
    </div>
    <div>
      <qr-code [value]="qrdata" [size]="width" [level]="level"></qr-code>
    </div>
  </div>

  <div>
    <h3>Change Values</h3>

    <h4>QR-Code Data:</h4>
    <button (click)="changeQrdata('Bruce')">Set "Bruce"</button>
    <button (click)="changeQrdata('Peter Parker')">
      Set "Peter Parker"
    </button>
    <button (click)="changeQrdata('42')">Set "42"</button>
    <br />
    <br />
    <label>
      or type to change: <input [(ngModel)]="qrdata" placeholder="name" />
    </label>

    <h4>Change Level</h4>
    <button (click)="changeLevel('L')">L</button>
    <button (click)="changeLevel('M')">M</button>
    <button (click)="changeLevel('Q')">Q</button>
    <button (click)="changeLevel('H')">H</button>

    <h4>Change Width</h4>
    <button (click)="changeWidth(512)">512</button>
    <button (click)="changeWidth(256)">256</button>
    <button (click)="changeWidth(128)">128</button>
    <button (click)="changeWidth(128)">64</button>
    <button (click)="changeWidth(10)">10</button>

  </div>
</div>
Component Class
// app.component.ts
import { Component } from '@angular/core';

@Component({
  selector: 'app-root',
  templateUrl: './app.component.html',
  styleUrls: ['./app.component.css']
})
export class AppComponent {
  title = 'angular-qr-code-tutorial';

  public qrdata: string = null;
  public level: "L" | "M" | "Q" | "H";
  public width: number;

  constructor() {
    this.level = "M";
    this.qrdata = "Initial QR code data string";
    this.width = 256;
  }

  changeLevel(newValue: "L" | "M" | "Q" | "H"): void {
    this.level = newValue;
  }

  changeQrdata(newValue: string): void {
    this.qrdata = newValue;
  }

  changeWidth(newValue: number): void {
    this.width = newValue;
  }
}
That’s it now run the Angular app by hitting $ ng serve --open.
Source Code
Find the source code of this application in my GitHub repository here.
Conclusion
Finally, we have implemented a QR-code generator in Angular application by using the best of the top available NPM package with a number of configurations.


Leave a Reply