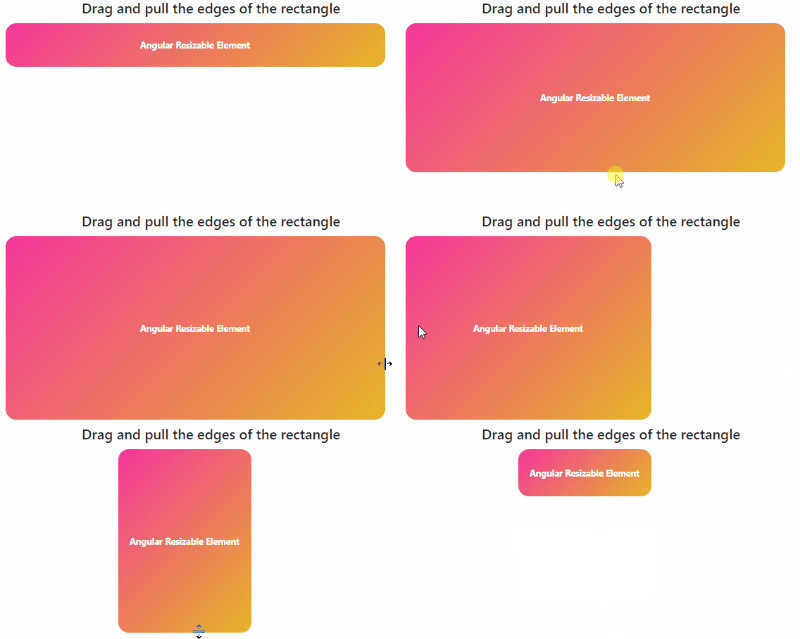
In this tutorial, we will Implement resizable feature on elements and layout. By adding resizable feature a user can resize a container or element by dragging from corners.
The resizable feature can be added in many areas in an application to resize the editable container, Images, Dashboard sections, etc.
To implement Resizable feature we will use angular-resizable-element package for Angular 6+ version by Matt Lewis
let’s get started!
First, let us create a new Angular project in version 8 using Ng CLI
Run following NPM command to create a new project
$ ng new AngularResizable
? Would you like to add Angular routing? No
? Which stylesheet format would you like to use? CSS
Here we are not using Routing to keep tutorial simple and opting CSS for styling
Install Resizable Package in Project
After successfully creating the project, run following NPM command to install Angular Resizable Element package
$ npm install --save angular-resizable-elementAfter that, we need to import ResizableModule in app.module.ts file in the imports array
//app.module.ts
import { BrowserModule } from '@angular/platform-browser';
import { NgModule } from '@angular/core';
import { AppComponent } from './app.component';

import { ResizableModule } from 'angular-resizable-element';

@NgModule({
  declarations: [
    AppComponent
  ],
  imports: [
    BrowserModule,
    ResizableModule
  ],
  providers: [],
  bootstrap: [AppComponent]
})
export class AppModule { }
Add Resizable Element in Component
Now in app.component.html file, add following HTML div container with mwlResizable directive
  <div
    class="rectangle"
    [ngStyle]="style"
    mwlResizable
    [validateResize]="validate"
    [enableGhostResize]="true"
    [resizeSnapGrid]="{ left: 1, right: 1 }"
    (resizeEnd)="onResizeEnd($event)"
  >
    Angular Resizable Element
    <div
      class="resize-handle-top"
      mwlResizeHandle
      [resizeEdges]="{ top: true }"
    ></div>
    <div
      class="resize-handle-left"
      mwlResizeHandle
      [resizeEdges]="{ left: true }"
    ></div>
    <div
      class="resize-handle-right"
      mwlResizeHandle
      [resizeEdges]="{ right: true }"
    ></div>
    <div
      class="resize-handle-bottom"
      mwlResizeHandle
      [resizeEdges]="{ bottom: true }"
    ></div>
  </div>
There are also 4 div elements with mwlResizeHandle directive which will act s resize handle.
(resizeEnd) is event handler which will trigger after the container is resized.
In the app.component.ts file, import ResizeEvent interface.
Add validate() method to set min width and height and onResizeEnd() method.
//app.component.ts
import { Component } from '@angular/core';
import { ResizeEvent } from 'angular-resizable-element';
@Component({
  selector: 'app-resizable-example',
  templateUrl: './resizable-example.component.html',
  styleUrls: ['./resizable-example.component.css']
})
export class AppComponent {

  constructor() { }

  public style: object = {};

  validate(event: ResizeEvent): boolean {
    const MIN_DIMENSIONS_PX: number = 50;
    if (
      event.rectangle.width &&
      event.rectangle.height &&
      (event.rectangle.width < MIN_DIMENSIONS_PX ||
        event.rectangle.height < MIN_DIMENSIONS_PX)
    ) {
      return false;
    }
    return true;
  }

  onResizeEnd(event: ResizeEvent): void {
    this.style = {
      position: 'fixed',
      left: `${event.rectangle.left}px`,
      top: `${event.rectangle.top}px`,
      width: `${event.rectangle.width}px`,
      height: `${event.rectangle.height}px`
    };
  }

}
Add CSS Style
Now update the app.component.css file with following CSS style for resizable container and resize handles.
mwlResizable {
  box-sizing: border-box;
}

.rectangle {
  position: relative;
  top: 200px;
  display: flex;
  align-items: center;
  justify-content: center;
  width: 300px;
  height: 150px;
  margin: auto;
  border-radius: 30px;
  font-size: 25px;
  font-weight: bold;
}
.resize-handle-top,
.resize-handle-bottom {
  position: absolute;
  height: 5px;
  cursor: row-resize;
  width: 100%;
}
.resize-handle-top {
  top: 0;
}
.resize-handle-bottom {
  bottom: 0;
}
.resize-handle-left,
.resize-handle-right {
  position: absolute;
  height: 100%;
  cursor: col-resize;
  width: 5px;
}
.resize-handle-left {
  left: 0;
}
.resize-handle-right {
  right: 0;
}
That’s it now run the app by running in a browser to test resizing feature.
$ ng serve --open

Leave a Reply