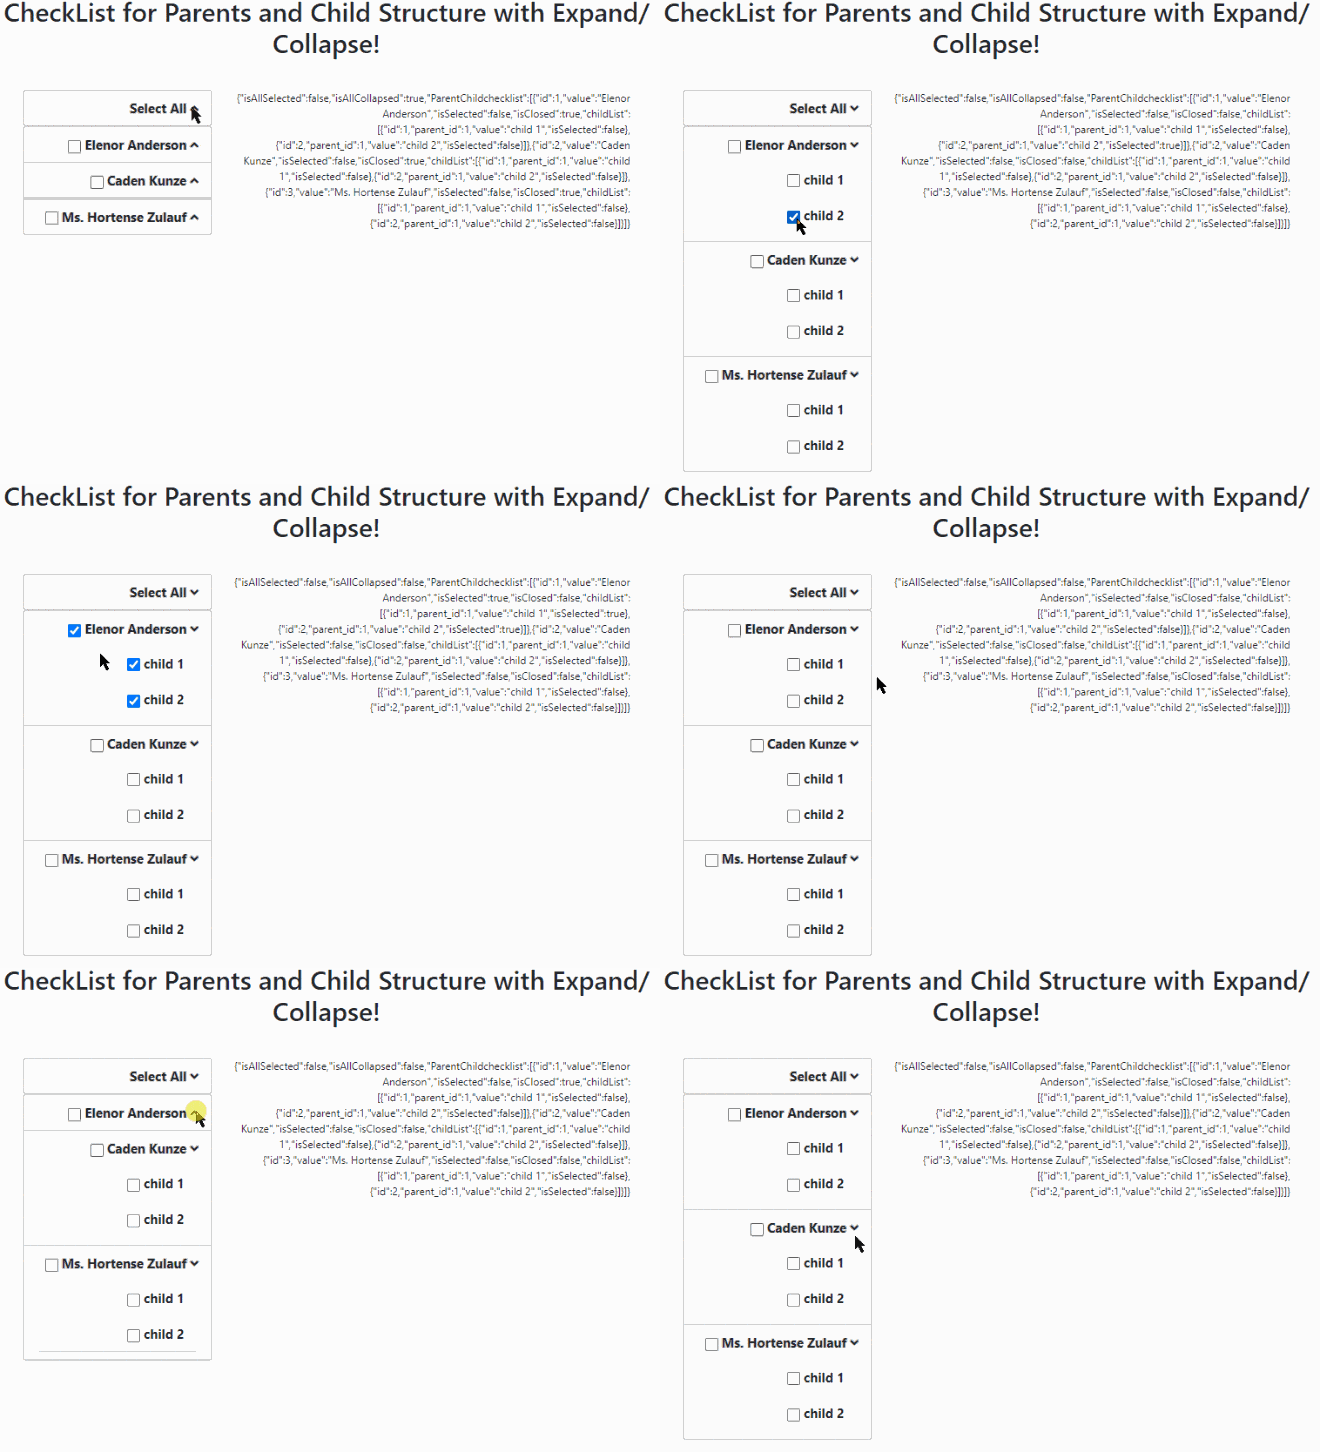
In this post we’ll discuss on How to Create a Checkbox List having parents and children structure, using a single data object. Moreover, each parent is in an expandable accordion tab to be collapsed to hide its child items.
The list checkboxes will have a child group and a parent checkbox each. Checking / Unchecking the parent will select/ unselect child list items. We’ll also implement expand collapse functionality on our list with a parent-child structure.
What we will do here?
- Create a list with parents and children each having a checkbox.
- Parents having controls to expand/ collapse respective children.
- Expand/ Collapse All control on top of the list.
- Select/ Unselect All control on top of the list.
[lwptoc]
Let’s begin with a new Angular Project.
Setup Requirements
To create npm commands, install NodeJs and install or update the Angular CLI by hitting below command
$ npm install -g @angular/cli
Create a new project
Run the following command to create a new Angular project using ng command
$ ng new angular-checklist-expand-collapse
? Would you like to add Angular routing? No
? Which stylesheet format would you like to use? SCSS
Move inside the project directory
$ cd angular-checklist-expand-collapse
Run Angular project
$ ng serve --open
Add FormsModule in App Module
First, we will import FormsModule in app.module.ts, as this module is required to use Models.
import { BrowserModule } from '@angular/platform-browser';
import { NgModule } from '@angular/core';

import { FormsModule } from '@angular/forms';

import { AppComponent } from './app.component';

@NgModule({
  declarations: [
    AppComponent
  ],
  imports: [
    BrowserModule,
    FormsModule
  ],
  providers: [],
  bootstrap: [AppComponent]
})
export class AppModule { }
Create a Checkbox List in Template View
In the template, we’ll add a hierarchical structure using UL LI elements with input controls. The collection of item object will create items using *ngFor Angular directive.
Open the app.component.html file and place below code
<div class="container">
  <div class="text-right mt-5">
    <div class="row">
      <div class="col-md-4">

        <!-- Master Checkbox -->
        <ul class="list-group">
          <li class="list-group-item">

            <span (click)="selectUnselectAll(data)">
              <span *ngIf="data.isAllSelected;else noneSelected">Unselect All </span>
              <ng-template #noneSelected>Select All </ng-template>
            </span>

            <!--Master Expand/ Collapse Arrow  -->
            <span (click)="expandCollapseAll(data)">
              <i class="fas fa-angle-up" *ngIf="data.isAllCollapsed;else isCollapsed"></i>
              <ng-template #isCollapsed><i class="fas fa-angle-down"></i></ng-template>
            </span>

          </li>
        </ul>

        <ul class="list-group">

          <!-- Parent Item -->
          <li class="list-group-item" *ngFor="let item of data.ParentChildchecklist">

            <!-- Parent Checkbox -->
            <input type="checkbox" [(ngModel)]="item.isSelected" name="list_name" value="{{item.id}}"
              (ngModelChange)="parentCheck(item)" />
            {{item.value}}
            <!-- Parent Arrow -->
            <span (click)="expandCollapse(item)">
              <i class="fas fa-angle-up" *ngIf="item.isClosed;else isCollapsed"></i>
              <ng-template #isCollapsed>
                <i class="fas fa-angle-down"></i>
              </ng-template>
            </span>
            <div class="child-list" [hidden]="item.isClosed">

              <ul class="list-group level-two">
                <!-- Child Item -->
                <li class="list-group-item level-two" *ngFor="let itemChild of
                item.childList">
                  <!-- Child Checkbox -->
                  <input type="checkbox" [(ngModel)]="itemChild.isSelected" name="list_name_child"
                    value="{{itemChild.id}}" (ngModelChange)="childCheck(item,item.childList)" />
                  {{itemChild.value}}
                </li>

              </ul>

            </div>
          </li>
        </ul>

      </div>
      <div class="col-md-8">
        {{stringify(data)}}
      </div>
    </div>
  </div>
</div>
Here we have two lists of parents their respective child list with corresponding checkboxes set to a boolean value given in the model.
Add Methods and Define Objects in AppComponent
In app.component.ts, we will define some variables and an object to create a list.
import { Component } from '@angular/core';

@Component({
  selector: 'app-root',
  templateUrl: './app.component.html',
  styleUrls: ['./app.component.scss']
})
export class AppComponent {
  title = 'CheckList for Parents and Child Structure with Expand/ Collapse';
  data: any;

  constructor() {
    this.data = {};
    this.data.isAllSelected = false;
    this.data.isAllCollapsed = false;

    //List object having hierarchy of parents and its children
    this.data.ParentChildchecklist = [
      {
        id: 1,value: 'Elenor Anderson',isSelected: false,isClosed:false,
        childList: [
          {
            id: 1,parent_id: 1,value: 'child 1',isSelected: false
          },
          {
            id: 2,parent_id: 1,value: 'child 2',isSelected: false
          }
        ]
      },
      {
        id: 2,value: 'Caden Kunze',isSelected: false,isClosed:false,childList: [
          {
            id: 1,parent_id: 1,value: 'child 1',isSelected: false
          },
          {
            id: 2,parent_id: 1,value: 'child 2',isSelected: false
          }
        ]
      },
      {
        id: 3,value: 'Ms. Hortense Zulauf',isSelected: false,isClosed:false,
        childList: [
          {
            id: 1,parent_id: 1,value: 'child 1',isSelected: false
          },
          {
            id: 2,parent_id: 1,value: 'child 2',isSelected: false
          }
        ]
      }
    ];
  }

  //Click event on parent checkbox
  parentCheck(parentObj) {
    for (var i = 0; i < parentObj.childList.length; i++) {
      parentObj.childList[i].isSelected = parentObj.isSelected;
    }
  }

  //Click event on child checkbox
  childCheck(parentObj, childObj) {
    parentObj.isSelected = childObj.every(function (itemChild: any) {
      return itemChild.isSelected == true;
    })
  }

  //Click event on master select
  selectUnselectAll(obj) {
    obj.isAllSelected = !obj.isAllSelected;
    for (var i = 0; i < obj.ParentChildchecklist.length; i++) {
      obj.ParentChildchecklist[i].isSelected = obj.isAllSelected;
      for (var j = 0; j < obj.ParentChildchecklist[i].childList.length; j++) {
        obj.ParentChildchecklist[i].childList[j].isSelected = obj.isAllSelected;
      }
    }
  }

  //Expand/Collapse event on each parent
  expandCollapse(obj){
    obj.isClosed = !obj.isClosed;
  }

  //Master expand/ collapse event
  expandCollapseAll(obj){
    for (var i = 0; i < obj.ParentChildchecklist.length; i++) {
      obj.ParentChildchecklist[i].isClosed = !obj.isAllCollapsed;
    }
    obj.isAllCollapsed = !obj.isAllCollapsed;
  }

  //Just to show updated JSON object on view
  stringify(obj) {
    return JSON.stringify(obj);
  }
}
Here we have used a single data variable of type any. In data, we have defined other attributes and List object as data.ParentChildchecklist.
In this object, we have id of parents and its childList object is having its own id and parent attribute. This id relation will help in the checkbox and expand/collapse functionality. Other methods used already having inline comments to tell its function.
Why we used (ngModelChange) instead of (click) listener on Input?
We need to use (ngModelChange) as <strong>(click)</strong> will not work as expected, when we use (click), it got fired and completed before a value of ngModel changes which is not expected behavior.
Add CSS styles
To make it look beautiful we have used bootstrap.css and some custom CSS in app.component.scss. For icons, we used FontAwsome library
Add this bootstrap.css and FontAwsome.css file in index.html
  <link rel="stylesheet" href="https://stackpath.bootstrapcdn.com/bootstrap/4.1.3/css/bootstrap.min.css">
  <link rel="stylesheet" href="https://use.fontawesome.com/releases/v5.5.0/css/all.css">
In app.component.scss replace following code:
.list-group-item{
    list-style: none;
    font-size: 20px;
    font-weight: bold;
    background-color: #E4E4E4;
    input[type=checkbox]{
        height: 20px;
        width: 20px;
        vertical-align:middle;
    }
    div.child-list{
        margin-top: 10px;
        .list-group-item{
            background-color: #fff;
        }
    }
}
After completing all the steps above Application will look like this
Source Code
Find source code in the GitHub repository here.
Conclusion
Finally, we implemented a list of items with checkboxes in a parent-child hierarchy. Users can select/unselect parent checkbox to control selection on child items. At the same time, child items can be expanded or collapsed by clicking parent items.
Hope you enjoyed this tutorial, please share your feedback
Happy coding 🙂


Leave a Reply