In this post, we will discuss How to load assets like images, CSS files, js files and another type of files in lazy load manner using Preload JS library. Using Preload we can check how much data is loaded and also check progress in percentage.
Preload Js can be used in a number of scenarios like if we have a number of heavy images then we can show a loader when images are loading in the background, then after the all images are loaded we can show success message or hide loader.
If our website is having a number of assets due to which it is taking time then we can move that data to Preload js which will show progress while loading or we can load that data after the website is loaded for user interactions.
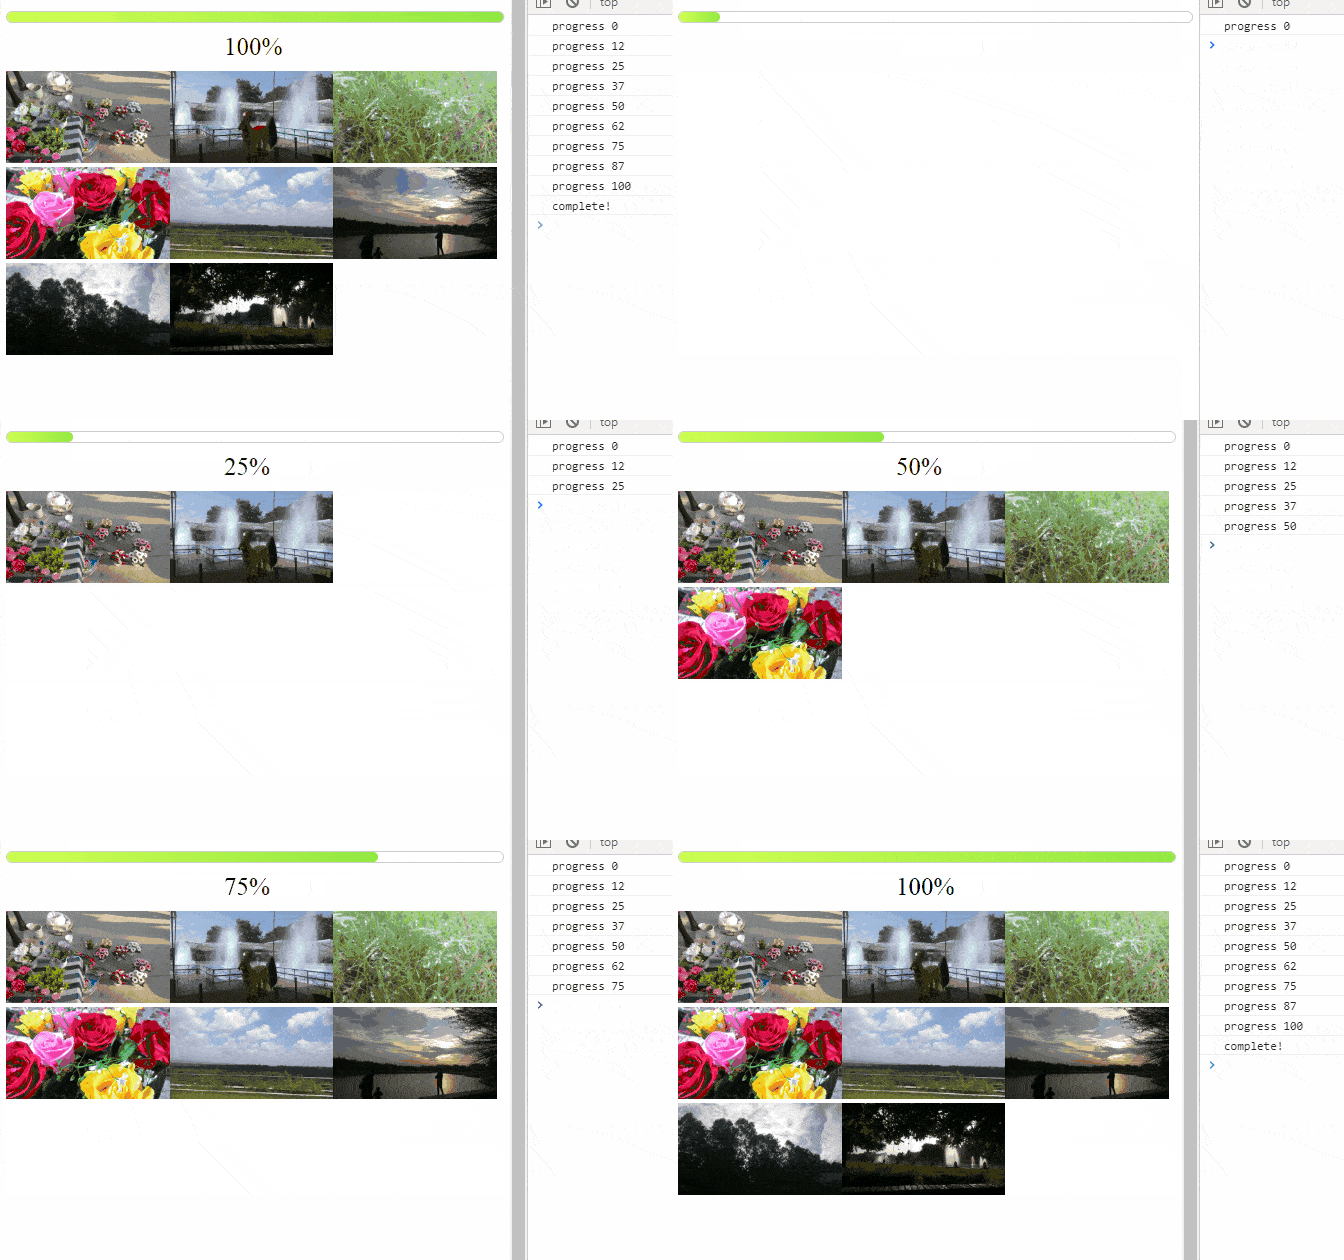
Let’s make a demo using Preload JS library, where we have some images that are loaded one by one with the progress shown real-time.
You can check more examples on official site here
First, add PreloadJS in project
<script src="https://code.createjs.com/1.0.0/preloadjs.min.js"></script>Then we will add some HTML div’s with respective IDs
        <!-- Show custom progress bar to show UI of percentage progress-->
        <div id="progress_bar">
                <div id="bar_percentage"></div>
        </div>

        <!-- Pecentage progress in numbers -->
        <div id="percentage_number"></div>

        <!-- Container to append Images loaded using PreloadJS -->
        <div id="gallery_images"></div>
After that, we will add JS code to load Image assets using the loadFile method, also there are callback methods to check the progress of loaded content.
Get DOM instance by using getElementById method
            var bar_percentage = document.getElementById("bar_percentage");
            var percentage_number = document.getElementById("percentage_number");
            var gallery_images = document.getElementById("gallery_images");
get instance of createjs in a variable
var img_queue = new createjs.LoadQueue();Add event listeners for “progress”, “complete” and “fileload” callbacks
            img_queue.addEventListener("progress", event => {
                var progress_percentage = Math.floor(event.progress*100);
                bar_percentage.style.width = progress_percentage+"%";
                percentage_number.innerHTML = progress_percentage+"%";
                console.log("progress "+Math.floor(event.progress*100));
            });
            img_queue.addEventListener("complete", event => {
                console.log("complete "+event.progress);
            });
            img_queue.addEventListener("fileload", handleFileComplete);


            function handleFileComplete(event){
               var item = event.item;
               var type = item.type;

                if(type == createjs.Types.IMAGE){
                    gallery_images.appendChild(event.result);
                }

            }
Above events “progress” and “complete” will be called for each loadFile method, then “fileload” method will be called after all files are loaded completely.
            img_queue.loadFile("./assets/images/1.png");
            img_queue.loadFile("./assets/images/2.png");
            img_queue.loadFile("./assets/images/3.png");
            img_queue.loadFile("./assets/images/4.png");
            img_queue.loadFile("./assets/images/5.png");
            img_queue.loadFile("./assets/images/6.png");
            img_queue.loadFile("./assets/images/7.png");
            img_queue.loadFile("./assets/images/8.png");
For styling the progress bar add following CSS styling
            #progress_bar{
                width: 100%;
                height: 10px;
                border:1px solid #ccc;
                border-radius: 25px;
            }
            #bar_percentage{
                width: 8%;
                height: 100%;
                border-radius: 25px;
                transition: width 0.3s ease-in-out;

                background: rgba(210,255,82,1);
                background: -moz-linear-gradient(left, rgba(210,255,82,1) 0%, rgba(145,232,66,1) 100%);
                background: -webkit-gradient(left top, right top, color-stop(0%, rgba(210,255,82,1)), color-stop(100%, rgba(145,232,66,1)));
                background: -webkit-linear-gradient(left, rgba(210,255,82,1) 0%, rgba(145,232,66,1) 100%);
                background: -o-linear-gradient(left, rgba(210,255,82,1) 0%, rgba(145,232,66,1) 100%);
                background: -ms-linear-gradient(left, rgba(210,255,82,1) 0%, rgba(145,232,66,1) 100%);
                background: linear-gradient(to right, rgba(210,255,82,1) 0%, rgba(145,232,66,1) 100%);
                filter: progid:DXImageTransform.Microsoft.gradient( startColorstr='#d2ff52', endColorstr='#91e842', GradientType=1 );

            }

            #percentage_number{
                margin: 10px auto;
                font-size: 25px;
                width: 60px;
            }

            #gallery_images img{
                width: 25%;
            }
After adding the above content, the final HTML will look like this
<!DOCTYPE html>
<html lang="en">
    <head>
        <meta charset="UTF-8">
        <meta name="viewport" content="width=device-width, initial-scale=1.0">
        <meta http-equiv="X-UA-Compatible" content="ie=edge">
        <title>Document</title>


        <style>
            #progress_bar{
                width: 100%;
                height: 10px;
                border:1px solid #ccc;
                border-radius: 25px;
            }
            #bar_percentage{
                width: 8%;
                height: 100%;
                border-radius: 25px;
                transition: width 0.3s ease-in-out;

                background: rgba(210,255,82,1);
                background: -moz-linear-gradient(left, rgba(210,255,82,1) 0%, rgba(145,232,66,1) 100%);
                background: -webkit-gradient(left top, right top, color-stop(0%, rgba(210,255,82,1)), color-stop(100%, rgba(145,232,66,1)));
                background: -webkit-linear-gradient(left, rgba(210,255,82,1) 0%, rgba(145,232,66,1) 100%);
                background: -o-linear-gradient(left, rgba(210,255,82,1) 0%, rgba(145,232,66,1) 100%);
                background: -ms-linear-gradient(left, rgba(210,255,82,1) 0%, rgba(145,232,66,1) 100%);
                background: linear-gradient(to right, rgba(210,255,82,1) 0%, rgba(145,232,66,1) 100%);
                filter: progid:DXImageTransform.Microsoft.gradient( startColorstr='#d2ff52', endColorstr='#91e842', GradientType=1 );

            }

            #percentage_number{
                margin: 10px auto;
                font-size: 25px;
                width: 60px;
            }

            #gallery_images img{
                width: 25%;
            }


        </style>
    </head>
    <body>

        <!-- Show custom progress bar to show UI of percentage progress-->
        <div id="progress_bar">
            <div id="bar_percentage"></div>
        </div>

        <!-- Pecentage progress in numbers -->
        <div id="percentage_number"></div>

        <!-- Container to append Images loaded using PreloadJS -->
        <div id="gallery_images"></div>


        <script src="https://code.createjs.com/1.0.0/preloadjs.min.js"></script>
        <script>

            var bar_percentage = document.getElementById("bar_percentage");
            var percentage_number = document.getElementById("percentage_number");
            var gallery_images = document.getElementById("gallery_images");

            var img_queue = new createjs.LoadQueue();
            img_queue.addEventListener("progress", event => {
                var progress_percentage = Math.floor(event.progress*100);
                bar_percentage.style.width = progress_percentage+"%";
                percentage_number.innerHTML = progress_percentage+"%";
                console.log("progress "+Math.floor(event.progress*100));
            });
            img_queue.addEventListener("complete", event => {
                console.log("complete "+event.progress);
            });
            img_queue.addEventListener("fileload", handleFileComplete);

            img_queue.loadFile("https://freakyjolly.com/demo/jquery/PreloadJS/images/1.png");
            img_queue.loadFile("https://freakyjolly.com/demo/jquery/PreloadJS/images/2.png");
            img_queue.loadFile("https://freakyjolly.com/demo/jquery/PreloadJS/images/3.png");
            img_queue.loadFile("https://freakyjolly.com/demo/jquery/PreloadJS/images/4.png");
            img_queue.loadFile("https://freakyjolly.com/demo/jquery/PreloadJS/images/5.png");
            img_queue.loadFile("https://freakyjolly.com/demo/jquery/PreloadJS/images/6.png");
            img_queue.loadFile("https://freakyjolly.com/demo/jquery/PreloadJS/images/7.png");
            img_queue.loadFile("https://freakyjolly.com/demo/jquery/PreloadJS/images/8.png");

            function handleFileComplete(event){
               var item = event.item;
               var type = item.type;

                if(type == createjs.Types.IMAGE){
                    gallery_images.appendChild(event.result);
                }

            }

        </script>
    </body>
</html>
See image below to check how this demo will work.
You can use this powerful library in any way you want this demo just explains an example of one way how it can be used with heavy image data.


Leave a Reply