In this quick tutorial, we will guide you on how to connect to a remote database from a local phpMyAdmin console. For connecting the remote database, we will use XAMPP on Windows 10 and use phpMyAdmin console to connect to a remote database.
XAMPP is a very well know tool to set up a localhost server and phpMyAdmin MySQL database management tool. You can easily download the setup and install it on your local.
In the next section, we will go through steps to quickly connect to a remove MySQL database from your local system inside the phpMyAdmin.
Connecting Remote Database using phpMyAdmin.
Before going through these steps, make sure phpMyAdmin is working on your system. You also install XAMPP to quickly set up with other tools.
Step 1) Update phpMyAdmin Config
Head towards the phpMyAdmin folder, and open the config.inc.php file. For XAMPP, you will find it on this location ~C:\xampp\phpMyAdmin\config.inc.php
Step 2) Append Credentials in Config
Next, add the credentials of the remote database you want to connect at bottom of the config.inc.php file:
.....

$i++;
$cfg['Servers'][$i]['host'] = 'my.hostname.com'; //provide hostname and port if other than default
$cfg['Servers'][$i]['user'] = 'dbusernamehere';   //user name for your remote server
$cfg['Servers'][$i]['password'] = 'ENTER_PASSWORD_HERE';  //password
$cfg['Servers'][$i]['auth_type'] = 'config';       // keep it as config

/*
 * End of servers configuration
 */

?>
Step 3) Run XAMPP Client
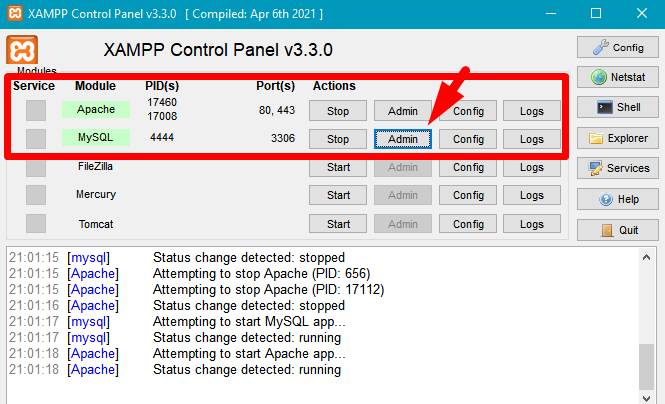
Thereafter, open the XAMPP client app, then start the Apache and MySQL apps. After turning them green, click on the Admin button for MySQL. If it was running, you need to restart these services.
Step 4) Switch User on phpMyAdmin
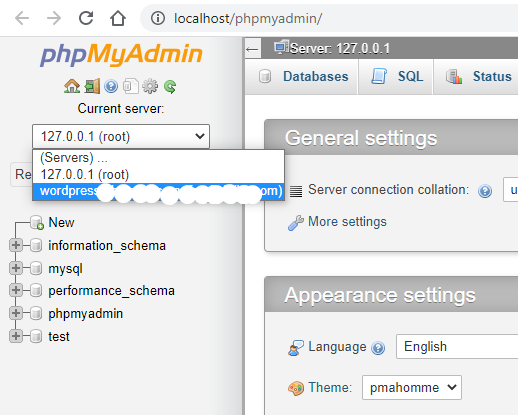
Finally, you just need to switch users on the home page. It will be shown on the left sidebar top:
After switching the required host, it will load the databases.
Hope it was helpful…


