In this post, we’ll discuss how to change the IP address in Tortoise SVN to connect to the Server to Commit or Update files and how to change the default port 80 or 81 to some other.
One of our teams maintains and controls application code versioning using the Subversion system when the HOST server keeps the up to date code base and each team member comments the code changes to the host so that other team members get updated files and folders.
If two more members update the same file at the same line then it can easily manage to merge by a manual or automatic procedure.
Using subversion or SVN version control makes code development very smooth and up to date.
What Is Subversion?
Subversion is a free/open-source version control system (VCS). That is, Subversion manages files and directories, and the changes made to them, over time. This allows you to recover older versions of your data or examine the history of how your data changed.[source]
We also know about Git which is also a popular version control system. Let’s check the difference between these
What is the Difference Between Git and SVN?
While Git and SVN are both enterprise version control systems (VCS) that help with workflow and project management in coding, they do have their differences. The difference between Git and SVN version control systems is that Git is a distributed version control system, whereas SVN is a centralized version control system. Git uses multiple repositories including a centralized repository and server, as well as some local repositories. SVN does not have a centralized repository or server.[source]
The Problem
Ok, so we have discussed what the Subversion control is and how it is different from Git. Now let’s have a look on the topic for which we are here.
Actually few days back the Static or Public IP address assigned to our central system or server having a Subversion server with the codebase needed to be changed.
Usually what we do is the client just right click on the SVN directory root folder and select TortoiseSVN then go to Relocate
After that, a window pops up to have updated address
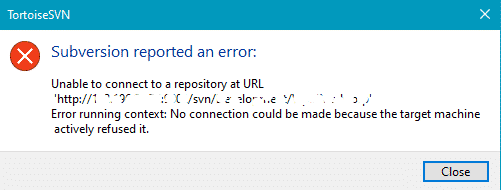
But this was not working, it is showing Relocating… message and ends with nothing or giving the following type of errors
1# Error
Unable to connect to a repository at URL ‘http://……’ Error running context: No connection could be made because the target machine actively refused it.
2# Error
SVN client error “The server at […] does not support the HTTP/DAV protocol”
Why does this happen?
This issue appears generally when the PORT we are proving is closed and not available to connect publically.
You can check if a port is open by proving the Public IP address here. The default PORT address which SVN uses is 80 or 81 these are ports that sometimes cannot be reopened for security reasons.
The Solution
The solution is to change the default PORT which you are going to use at the client to connect the Subversion Server. For that, you need to install the VisualSVNServer . VisualSVN Server allows you to easily install and manage a fully-functional Subversion server on the Windows platform.
Most of the cases, it may be already installed on your server computer.
Make changes in the VisualSVNServer
Step 1) Open the VisualSVN Server then under “Subversion Authentication” click Configure authentication options…
Step 2) Select the “Network” tab then enter the local IP address in the Server name of the system and required Server port (it was 7001 in my case). After updating click Apply
That’s it
Now at the client-side, you need to reopen the Relocate window and enter the Public Static IP address(it will be different from local IP which you just entered in the previous step) with the PORT you just entered.
Then hit OK and it will be relocated!
I hope this will help if you are also facing some similar issue 🙂 do share your feedback and suggestions which can help others.


Leave a Reply