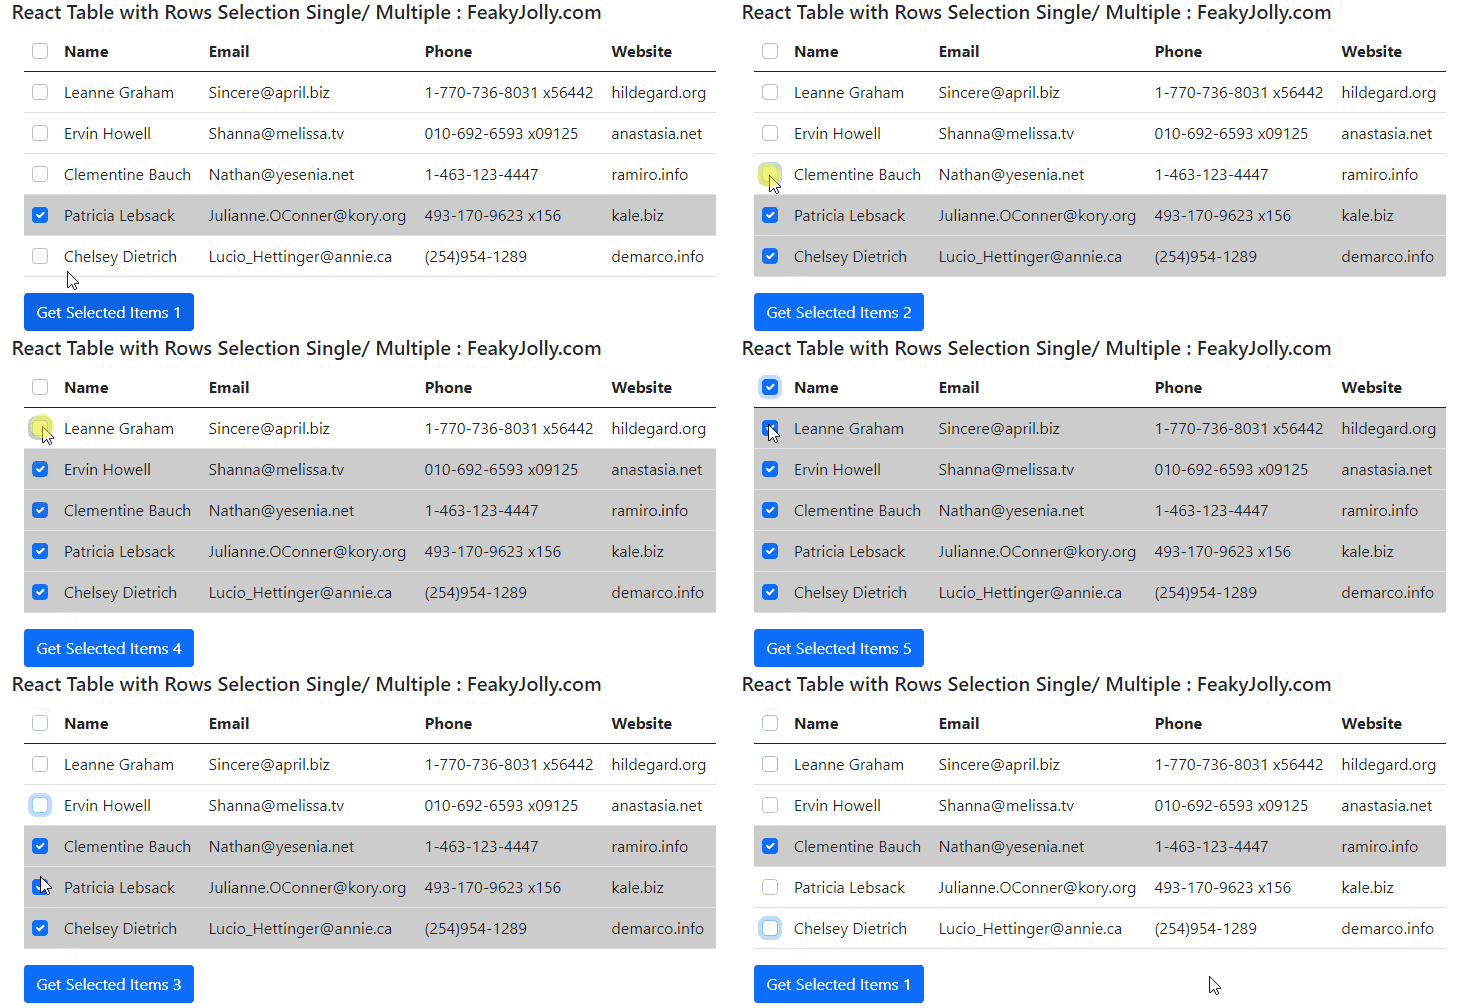
In this guide, you will learn how to select/ unselect single or multiple rows in a table using checkboxes. Moreover, you will be able to check/ uncheck the master checkbox on the table header to select/ deselect table rows.
React table with row selection with help of checkboxes can be really handy to allow users to mark or perform rows selection. The master checkbox on the table header can be used to select or unselect all the table rows at once. You will learn how to the main state for table list items each having a selected boolean to control the checked state.
On top of that, if all the table rows are selected manually, it will change the master checkbox state accordingly. To style the table, we will use bootstrap 4 classes. This is how our table with checkbox rows selection will look:
How to Add Checkboxes for Row Selection in React Table?
- Step 1 – Create React App
- Step 2 – Install Bootstrap Package
- Step 3 – Create Select Table Component
- Step 4 – Adding Selectable Table Component in App.js
- Step 5 – Serve React Application
Step 1 – Create React App
To start with, create a new react application by executing the npx command in the terminal window:
npx create-react-app react-checkbox-table-appMove into the react app directory:
cd <code class="language-bash">react-checkbox-table-appStep 2 – Install Bootstrap Package
This step is optional but to quickly style the table you can install the bootstrap package by executing the below command:
npm install bootstrapStep 3 – Create Select Table Component
Now, head towards the ~src folder and create a new file name select-table.component.js and update it with the following code:
import React from "react";

const Users = [
  {
    id: 1,
    selected: false,
    name: "Leanne Graham",
    email: "Sincere@april.biz",
    phone: "1-770-736-8031 x56442",
    website: "hildegard.org",
  },
  {
    id: 2,
    selected: false,
    name: "Ervin Howell",
    email: "Shanna@melissa.tv",
    phone: "010-692-6593 x09125",
    website: "anastasia.net",
  },
  {
    id: 3,
    selected: false,
    name: "Clementine Bauch",
    email: "Nathan@yesenia.net",
    phone: "1-463-123-4447",
    website: "ramiro.info",
  },
  {
    id: 4,
    selected: true,
    name: "Patricia Lebsack",
    email: "Julianne.OConner@kory.org",
    phone: "493-170-9623 x156",
    website: "kale.biz",
  },
  {
    id: 5,
    selected: false,
    name: "Chelsey Dietrich",
    email: "Lucio_Hettinger@annie.ca",
    phone: "(254)954-1289",
    website: "demarco.info",
  },
];

class SelectTableComponent extends React.Component {
  constructor(props) {
    super(props);
    this.state = {
      List: Users,
      MasterChecked: false,
      SelectedList: [],
    };
  }

  // Select/ UnSelect Table rows
  onMasterCheck(e) {
    let tempList = this.state.List;
    // Check/ UnCheck All Items
    tempList.map((user) => (user.selected = e.target.checked));

    //Update State
    this.setState({
      MasterChecked: e.target.checked,
      List: tempList,
      SelectedList: this.state.List.filter((e) => e.selected),
    });
  }

  // Update List Item's state and Master Checkbox State
  onItemCheck(e, item) {
    let tempList = this.state.List;
    tempList.map((user) => {
      if (user.id === item.id) {
        user.selected = e.target.checked;
      }
      return user;
    });

    //To Control Master Checkbox State
    const totalItems = this.state.List.length;
    const totalCheckedItems = tempList.filter((e) => e.selected).length;

    // Update State
    this.setState({
      MasterChecked: totalItems === totalCheckedItems,
      List: tempList,
      SelectedList: this.state.List.filter((e) => e.selected),
    });
  }

  // Event to get selected rows(Optional)
  getSelectedRows() {
    this.setState({
      SelectedList: this.state.List.filter((e) => e.selected),
    });
  }

  render() {
    return (
      <div className="container">
        <div className="row">
          <div className="col-md-12">
            <table className="table">
              <thead>
                <tr>
                  <th scope="col">
                    <input
                      type="checkbox"
                      className="form-check-input"
                      checked={this.state.MasterChecked}
                      id="mastercheck"
                      onChange={(e) => this.onMasterCheck(e)}
                    />
                  </th>
                  <th scope="col">Name</th>
                  <th scope="col">Email</th>
                  <th scope="col">Phone</th>
                  <th scope="col">Website</th>
                </tr>
              </thead>
              <tbody>
                {this.state.List.map((user) => (
                  <tr key={user.id} className={user.selected ? "selected" : ""}>
                    <th scope="row">
                      <input
                        type="checkbox"
                        checked={user.selected}
                        className="form-check-input"
                        id="rowcheck{user.id}"
                        onChange={(e) => this.onItemCheck(e, user)}
                      />
                    </th>
                    <td>{user.name}</td>
                    <td>{user.email}</td>
                    <td>{user.phone}</td>
                    <td>{user.website}</td>
                  </tr>
                ))}
              </tbody>
            </table>
            <button
              className="btn btn-primary"
              onClick={() => this.getSelectedRows()}
            >
              Get Selected Items {this.state.SelectedList.length}
            </button>
            <div className="row">
              <b>All Row Items:</b>
              <code>{JSON.stringify(this.state.List)}</code>
            </div>
            <div className="row">
              <b>Selected Row Items(Click Button To Get):</b>
              <code>{JSON.stringify(this.state.SelectedList)}</code>
            </div>
          </div>
        </div>
      </div>
    );
  }
}

export default SelectTableComponent;
The state is comprising of three variables named List, MasterChecked, SelectedList. To maintain a list of all items in the table, boolean for the master checkbox and the list of selected items respectively.
The Bootstrap styles checkbox are placed on the table header and on each table row with their own onChange event handlers.
Table rows are iterated by using the Javascript map() function. Each row is adding the "selected" class if its selected boolean property is true.
The onMasterCheck() and onItemCheck() methods play an important role in maintaining and controlling the state of checkboxes on each row and master header.
Step 4 – Adding Selectable Table Component in App.js
We are ready to import the SelectTableComponent in the App.js file. Also, import the bootstrap.css file to use its style on the table.
Open the App.js file and update it with the following code:
import React from "react";
import "../node_modules/bootstrap/dist/css/bootstrap.min.css";
import "./App.css";
import SelectTableComponent from "./select-table.component";

export default function App() {
  return (
    <div className="container">
      <h1>React Table with Rows Selection Single/ Multiple : FeakyJolly.com</h1>

      <SelectTableComponent />
    </div>
  );
}
Step 5 – Serve React Application
Finally, you can see the selectable table row table in react application by executing the below command in the terminal window:
npm startit will run the application at the following URL:
http://localhost:3000/Conclusion
We have completed our tutorial on creating a table in react app with selectable rows having a master checkbox on the header. Users can easily select and deselect table rows. it’s very easy to get selected table rows as weel by clicking the button even handler.
We have maintained a local state for most of the things which can be easily modil=fiedls according to the project needs.
hope this was helpful.. thanks..


