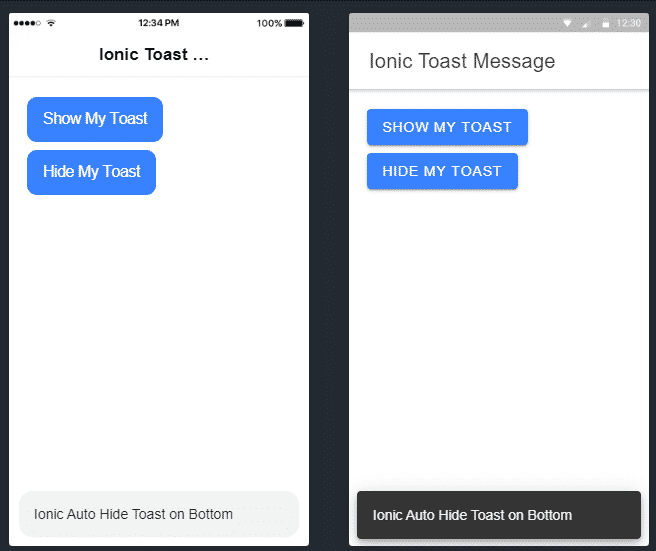
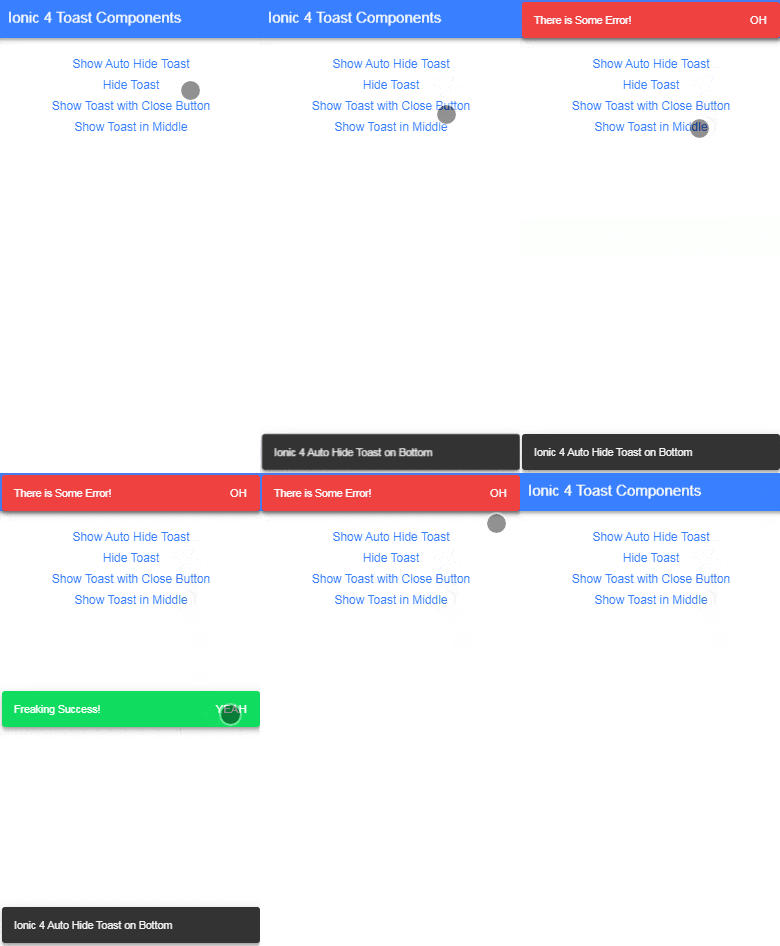
In this Ionic 5/4 tutorial, we’ll discuss How to show Toasts notification messages in Ionic Angular Application. Ionic provides ToastController using which we can show Native looking toast messages in our Ionic hybrid application.
Toasts are basically messages which are used to show some sort of information to users like success or error messages with action buttons using which we can ask a user to perform some action by tapping the toast. These are similar to Native toasts shown in Android or IOS applications.
Ionic Toast API provides a number of options like color, Auto Hide, animation, position on the screen etc. Later we will also discuss on How to Add Custom CSS like color, background, border etc to Toast
Let’s check how to implement these in our default Home component.
Create New Ionic App
Run the following command to create a new Ionic Angular application with a blank template
$ ionic start ionic-in-app-purchase-app blank --type=angularMove inside the application folder
$ cd ionic-in-app-purchase-appRun your application
$ ionic serve --labYou may need to install the lab package
? Install @ionic/lab? Yes
Create a Reusable Toast Service
Toasts can be used anywhere in the application, so it is always a good practice to keep the code DRY( don’t repeat yourself ).
Create a new service under services folder by running ionic generate command
$ ionic generate service services/ionic-toastAbove command will create the IonicToastService service at this ~app/services/ionic-toast.service.ts location with following code in it
// ionic-toast.service.ts
import { Injectable } from '@angular/core';

@Injectable({
  providedIn: 'root'
})
export class IonicToastService {

  constructor() { }
}
Adding ToastController in Service
We can simply start using Toast by importing the ToastController available under @ionic/angular package, then include in the constructor.
Now open the ionic-toast.service.ts file to make it look like this
// ionic-toast.service.ts
import { Injectable } from '@angular/core';
import { ToastController } from '@ionic/angular';

@Injectable({
  providedIn: 'root'
})
export class IonicToastService {

  constructor(
    public toast: ToastController
  ) { }
  ...
}
Creating a Toast using ToastController
The ToastController provides two important methods the create() and dismiss(), they both return a promise.
How to show an Ionic Toast?
The create() method is used to present() a toasting method controlled by configuration property supplied as shown below:
showToast() {
    this.myToast = this.toast.create({
      message: 'Ionic 4 Auto Hide Toast on Bottom',
      duration: 2000
    }).then((toastData) => {
      console.log(toastData);
      toastData.present();
    });
  }
The duration property makes a toast to auto dismiss in a specified time of we can do it manually.
How to dismiss or hide an Ionic Toast?
The dismiss() method is called on the instance toast of create() method as shown below:
// ionic-toast.service.ts
import { Injectable } from '@angular/core';
import { ToastController } from '@ionic/angular';

@Injectable({
  providedIn: 'root'
})
export class IonicToastService {

  private myToast: any;

  constructor(
    private toast: ToastController
  ) { }

  showToast() {
    this.myToast = this.toast.create({
      message: 'Ionic Auto Hide Toast on Bottom',
      duration: 2000
    }).then((toastData) => {
      console.log(toastData);
      toastData.present();
    });
  }
  HideToast() {
    this.myToast = this.toast.dismiss();
  }

}
Using IonicToast Service in Home
Now, we will see how to use this service on an application component page. In the Home Page make the following change for class and template.
Update home.page.ts class file
// home.page.ts
import { Component } from '@angular/core';
import { IonicToastService } from '../services/ionic-toast.service';

@Component({
  selector: 'app-home',
  templateUrl: 'home.page.html',
  styleUrls: ['home.page.scss'],
})
export class HomePage {

  constructor(
    private ionicToastService: IonicToastService
  ) { }

  showMyToast() {
    this.ionicToastService.showToast();
  }
  hideMyToast() {
    this.ionicToastService.HideToast();
  }

}
The showMyToast() and hideMyToast() are local methods in the Home class which is actually calling the service methods. So we don’t need to import the ToastController anywhere else.
In the home.page.html template add two buttons to show and hide the toast.
<ion-content [fullscreen]="true" class="ion-padding">

  <ion-button (click)="showMyToast()">Show My Toast</ion-button>

  <ion-button (click)="hideMyToast()">Hide My Toast</ion-button>

</ion-content>
Now you can test the application by hitting $ ionic serve --lab command in the terminal
Properties of Create Method
In the create() method we can pass following option properties to configure the toast:
Ionic Toast has many options available:
animated: If true, the toast will animate.buttons: An array of buttons for the toast.color: The color to use from your application’s color palette. Default options are:"primary", "secondary", "tertiary", "success", "warning", "danger", "light", "medium",and"dark".For more information on colors, see theming.cssClass: Additional classes to apply for custom CSS. If multiple classes are provided they should be separated by spaces.duration: How many milliseconds to wait before hiding the toast. By default, it will show until dismiss() is called.enterAnimation: Animation to use when the toast is presented.header: Header to be shown in the toast.keyboardClose: If true, the keyboard will be automatically dismissed when the overlay is presented.leaveAnimation: Animation to use when the toast is dismissed.message: Message to be shown in the toast.mode: The mode determines which platform styles to use.Type"ios"|"md"position: The position of the toast on the screen.Type"bottom"|"middle"|"top"
Default'bottom'translucent: If true, the toast will be translucent. It only applies when the mode is “ios” and the device supports backdrop-filter.
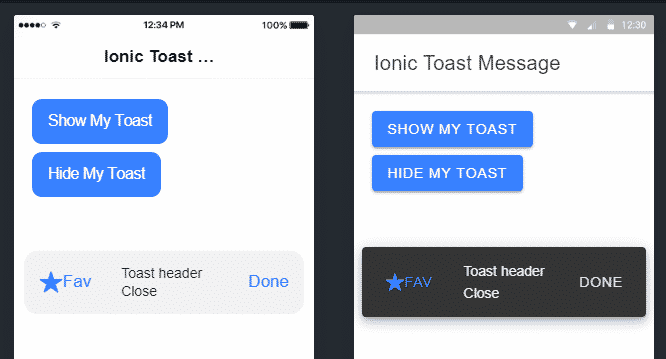
By using the buttons property we can add multiple action buttons with event handler callbacks as shown below:
showToast() {
    this.myToast = this.toast.create({
      header: 'Toast header',
      message: 'Close',
      position: 'middle',
      buttons: [
        {
          side: 'start',
          icon: 'star',
          text: 'Fav',
          handler: () => {
            console.log('Favorite clicked');
          }
        }, {
          text: 'Done',
          role: 'cancel',
          handler: () => {
            console.log('Cancel clicked');
          }
        }
      ]
    }).then((toastData) => {
      console.log(toastData);
      toastData.present();
    });
  }
How to Customize Toast Style Using Custom CSS?
my-custom-class‘ class using the cssClass option property:this.myToast = this.toast.create({
message: 'Ionic Auto Hide Toast on Bottom',
showCloseButton: true,
position: 'middle',
closeButtonText: 'Yeah',
animated:true,
cssClass:"my-custom-class"
}).then((toastData)=>{
console.log(toastData);
toastData.present();
});In the above code, we have added "<strong>my-custom-class</strong>" after that we will move to file global.scss then add the following style in it
.my-custom-class{
    --background: #FFDB22;
    --color:#FF3F22;
    --border-style:solid;
    --border-width :5px;
    --border-color:#FF3F22;
}
You can find more style variables here
How to Position the Ionic Toast?
To position the toast we can set the position property of create() method to “bottom” | “middle” | “top” where “bottom” is the default.
Conclusion
We have implemented Ionic toast in Ionic Angular app using ToastController methods. We also discussed how to use various available properties to position, customize style, and handle button events inside the toast. We create a reusable toast service which can help to show toast messages anywhere in the app without repeating the code.
Hope you enjoyed this post, do share your feedback and suggestions.


