In this Ionic 5/4 tutorial, we’ll implement Image picker functionality in Ionic Angular application by installing Cordova and Native plugins.
In Ionic applications, we may have support to select multimedia data by a user like images, for that we can show an Image Picker feature for easy selection of Images. In this post, we will discuss How to Add image Picker Ionic native Plugin. After adding this Cordova and native plugin you can easily choose images and show selected images on the page.
We can easily adjust quality, number images to select, height, and width of images which will be selected from the user directory.
Also Read: Ionic | Crop Images using Ionic 4 native plugin with Image Picker
Let’s get started…
Create a new Ionic App using below CLI command
We’ll create a new Ionic Angular application with a blank template.
$ ionic start IonicImagePicker blank
Install Cordova and Ionic Native Plugin
Run following commands to install the Image Picker Cordova and Native plugins
$ ionic cordova plugin add cordova-plugin-telerik-imagepicker
$ npm install @ionic-native/image-picker
Import Plugin in App’s Main Module
In app.module.ts file import plugin and add in the providers array
import { NgModule } from '@angular/core';
import { BrowserModule } from '@angular/platform-browser';
import { RouteReuseStrategy } from '@angular/router';

import { IonicModule, IonicRouteStrategy } from '@ionic/angular';
import { SplashScreen } from '@ionic-native/splash-screen/ngx';
import { StatusBar } from '@ionic-native/status-bar/ngx';

import { AppComponent } from './app.component';
import { AppRoutingModule } from './app-routing.module';

import { ImagePicker } from '@ionic-native/image-picker/ngx';

@NgModule({
  declarations: [AppComponent],
  entryComponents: [],
  imports: [BrowserModule, IonicModule.forRoot(), AppRoutingModule],
  providers: [
    StatusBar,
    SplashScreen,
    ImagePicker,
    { provide: RouteReuseStrategy, useClass: IonicRouteStrategy }
  ],
  bootstrap: [AppComponent]
})
export class AppModule { }
Home Component and HTML template
In home.page.ts file replace following code. This is having the getPictures() method which will open Image Picker UI and after selection will return selected images which we are putting in an array as a set of Base64 urls to show in the Home template.
import { Component } from '@angular/core';

import { ImagePicker } from '@ionic-native/image-picker/ngx';

@Component({
  selector: 'app-home',
  templateUrl: 'home.page.html',
  styleUrls: ['home.page.scss'],
})
export class HomePage {

  imageResponse: any;
  options: any;

  constructor(private imagePicker: ImagePicker) { }

  getImages() {
    this.options = {
      // Android only. Max images to be selected, defaults to 15. If this is set to 1, upon
      // selection of a single image, the plugin will return it.
      //maximumImagesCount: 3,

      // max width and height to allow the images to be.  Will keep aspect
      // ratio no matter what.  So if both are 800, the returned image
      // will be at most 800 pixels wide and 800 pixels tall.  If the width is
      // 800 and height 0 the image will be 800 pixels wide if the source
      // is at least that wide.
      width: 200,
      //height: 200,

      // quality of resized image, defaults to 100
      quality: 25,

      // output type, defaults to FILE_URIs.
      // available options are
      // window.imagePicker.OutputType.FILE_URI (0) or
      // window.imagePicker.OutputType.BASE64_STRING (1)
      outputType: 1
    };
    this.imageResponse = [];
    this.imagePicker.getPictures(this.options).then((results) => {
      for (var i = 0; i < results.length; i++) {
        this.imageResponse.push('data:image/jpeg;base64,' + results[i]);
      }
    }, (err) => {
      alert(err);
    });
  }

}
Home Page Template
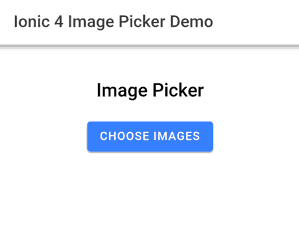
In home.page.html file replace the following code, having a button to open the Image Picker module, after that selected images will be shown in *ngFor iteration.
<ion-header>
  <ion-toolbar>
    <ion-title>
      Ionic Image Picker Demo
    </ion-title>
  </ion-toolbar>
</ion-header>

<ion-content padding>

  <ion-grid>
    <ion-row>
      <ion-col text-center>
        <h3>Image Picker</h3>
      </ion-col>
    </ion-row>
    <ion-row>
      <ion-col text-center>
        <ion-button (click)="getImages()">Choose Images</ion-button>
      </ion-col>
    </ion-row>
    <ion-row>
      <ion-col>
        <!-- More Pinterest floating gallery style -->
        <div class="images">
          <div class="one-image" *ngFor="let img of imageResponse">
            <img src="{{img}}" alt="" srcset="">
          </div>
        </div>
      </ion-col>
    </ion-row>
  </ion-grid>
</ion-content>
Update CSS Style
For styling, the Selected Images like Pinterest replace following in the home.page.scss file.
.image-container {
  min-height: 200px;
  background-size: cover;
}

@media (min-width: 0px) {
  .images {
    column-count: 2;
  }
}

@media (min-width: 420px) {
  .images {
    column-count: 3;
  }
}

@media (min-width: 720px) {
  .images {
    column-count: 4;
  }
}

.one-image {
  margin: 2px;
}
That’s it now you can run your application in a real device to see it working
Run Application in Real Device
To check vibration functionality, you need to run the application in a real device. For that, you need to add the Platform for which you are going to build the application.
Add Platform in Application
Run the following command in the terminal to install the required platform
# Add Android
$ ionic cordova platform add android

# Add iOS
$ ionic cordova platform add ios

# Add Windows
$ ionic cordova platform add windows
Build Runnable File
After adding the platform, you can run the following commands to create an executable file like APK file for Android. Or you can simply run the app in the USB connected mobile with USB Debugging enabled discussed in the next step.
# Build Android
$ ionic cordova build android

# Build iOS
$ ionic cordova build ios

# Build Windows
$ ionic cordova build windows
Live Run Application in USB connected Device
If you just want to run the application in the real device and debug it on the Chrome browser, just execute the following command after connecting your mobile to your computer
# Live Run on Android
$ ionic cordova run android -l

# Live Run on iOS
$ ionic cordova run ios -l

# Live Run on Windows
$ ionic cordova run windows -l
Conclusion
That’s it in this tutorial we discussed how to implement Vibration functionality in a different way using Cordova and Native plugin in an Ionic application. We also discussed how to add platform and test application in a real device to check native features.
If you enjoyed the content. Do share with other geeks. Thanks for reading!


