A few days back I was working on an offline application having an Image gallery. So the common feature which I needed for a user was to save gallery images in the device and Share those images in Whatsapp or other social media.
For that I read many tutorial and forums, after doing some study on how things work in ionic, I got to know that in the Ionic application we cannot save or share media applications assets files like images or PDF’s directly.
Sharing is only possible if we have Images or any other file in phone memory. If we are going to share an image in our assets/img folder, then first we need to save that image in our phone’s memory then from that location, we can share that image anywhere we want.
Also Read: Ionic | Crop Images selected from Image Selector show in a base64 format using Native plugins
See Working Application in Playstore Here
So Let’s start…
Here we will do two things
1) Save Ionic’s assets folder media like images or any other file to a phone so that user can open with phones default viewers.
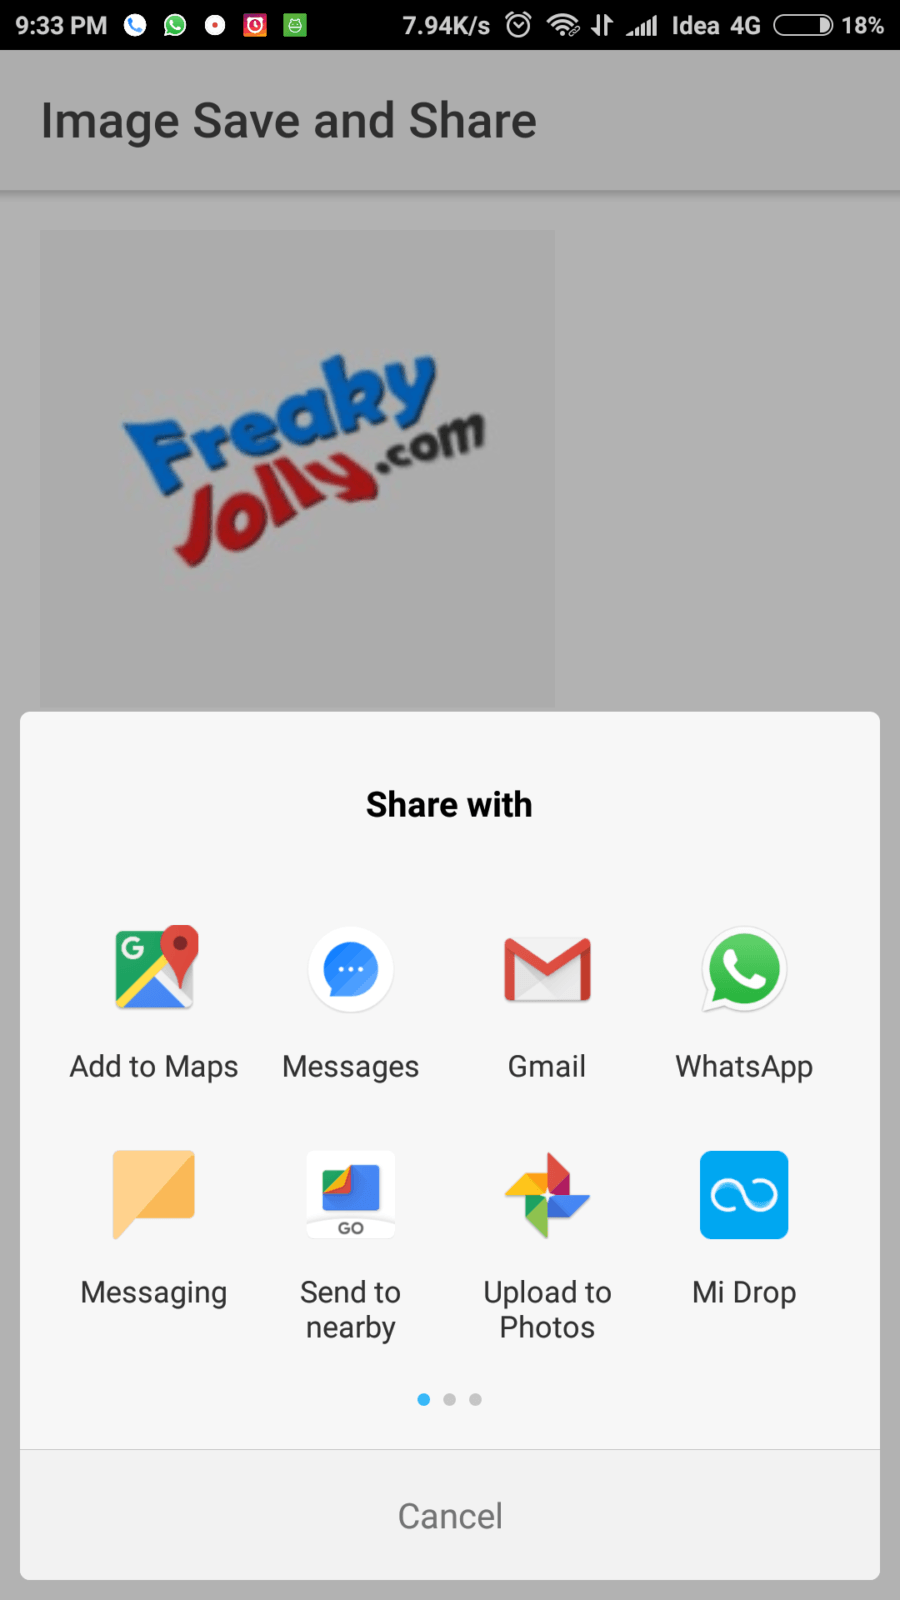
2) We will share Ionic’s assets folder images social networks like Whatsapp, Facebook or Gmail.
Also See: Ionic 3 – Implement Image Viewer for Photos in Assets folder
Step 1) Let’s create a new application
$ ionic start saveNShareImage
Step 2) Now add a sample image in assets folder
saveNShareImage\src\assets\imgs\FreakyJolly.jpg
Step 3) In home.html file add following code.
<ion-header>
  <ion-navbar>
    <ion-title>
      Image Save and Share
    </ion-title>
  </ion-navbar>
</ion-header>

<ion-content padding>

  <img src="/assets/imgs/FreakyJolly.jpg" />


  <ion-grid>
    <ion-row>
      <ion-col class="rightBtn">
          <button ion-button small round icon-left outline  mode="ios" color="shareBtn" (click)="shareImg(img)">
              <ion-icon name="share"></ion-icon>
              <b>Share</b>
          </button>
      </ion-col>
      <ion-col class="leftBtn">
          <button ion-button small round icon-left outline mode="ios" color="saveBtn" (click)="saveImg(img)">
              <ion-icon name="download"></ion-icon>
              <b>Save</b>
          </button>
    </ion-col>
  </ion-row>
</ion-grid>


</ion-content>
Install “File“, “FileOpener” Module. File module will let our application to access native memory hardware location to do multiple file operations like reading, write, move, copy, list files, open file etc.
Install “File” Module
$ ionic cordova plugin add cordova-plugin-file
$ npm install --save @ionic-native/file
Install “FileOpener”
$ ionic cordova plugin add cordova-plugin-file-opener2
$ npm install --save @ionic-native/file-opener
Install “Social Sharing”
$ ionic cordova plugin add cordova-plugin-x-socialsharing
$ npm install --save @ionic-native/social-sharing
Update: corrected links in “Social Sharing“
Install Android Support v4 client library
$ cordova plugin add cordova-android-support-gradle-release --variable ANDROID_SUPPORT_VERSION=24.+We need to add this plugin due to this bug. This bug doesn’t let android create successful build and give error similar to following. Installing this plugin will resolve this issue.
* What went wrong:
Execution failed for task ‘:app:processDebugResources’.
> Failed to execute aapt
Replace the code in app.module.ts with following then it will look like this
import { BrowserModule } from '@angular/platform-browser';
import { ErrorHandler, NgModule } from '@angular/core';
import { IonicApp, IonicErrorHandler, IonicModule } from 'ionic-angular';
import { SplashScreen } from '@ionic-native/splash-screen';
import { StatusBar } from '@ionic-native/status-bar';

import { MyApp } from './app.component';
import { HomePage } from '../pages/home/home';


import { File } from '@ionic-native/file';
import { FileOpener } from '@ionic-native/file-opener';
import { SocialSharing } from '@ionic-native/social-sharing';

@NgModule({
  declarations: [
    MyApp,
    HomePage
  ],
  imports: [
    BrowserModule,
    IonicModule.forRoot(MyApp)
  ],
  bootstrap: [IonicApp],
  entryComponents: [
    MyApp,
    HomePage
  ],
  providers: [
    StatusBar,
    SplashScreen,
    File,
    FileOpener,
    SocialSharing,
    {provide: ErrorHandler, useClass: IonicErrorHandler}
  ]
})
export class AppModule {}
import { Component } from '@angular/core';
import { NavController } from 'ionic-angular';
import { File } from '@ionic-native/file';
import { FileOpener } from '@ionic-native/file-opener';
import { SocialSharing } from '@ionic-native/social-sharing';
@Component({
selector: 'page-home',
templateUrl: 'home.html'
})
export class HomePage {
constructor(
public navCtrl: NavController,
private file: File,
private fileOpener: FileOpener,
private socialSharing: SocialSharing) {
}
//Save Image Function
saveImg() {
let imageName = "FreakyJolly.jpg";
const ROOT_DIRECTORY = 'file:///sdcard//';
const downloadFolderName = 'tempDownloadFolder';
//Create a folder in memory location
this.file.createDir(ROOT_DIRECTORY, downloadFolderName, true)
.then((entries) => {
//Copy our asset/img/FreakyJolly.jpg to folder we created
this.file.copyFile(this.file.applicationDirectory + "www/assets/imgs/", imageName, ROOT_DIRECTORY + downloadFolderName + '//', imageName)
.then((entries) => {
//Open copied file in device's default viewer
this.fileOpener.open(ROOT_DIRECTORY + downloadFolderName + "/" + imageName, 'image/jpeg')
.then(() => console.log('File is opened'))
.catch(e => alert('Error' + JSON.stringify(e)));
})
.catch((error) => {
alert('error ' + JSON.stringify(error));
});
})
.catch((error) => {
alert('error' + JSON.stringify(error));
});
}
shareImg() {
let imageName = "FreakyJolly.jpg";
const ROOT_DIRECTORY = 'file:///sdcard//';
const downloadFolderName = 'tempDownloadFolder';
//Create a folder in memory location
this.file.createDir(ROOT_DIRECTORY, downloadFolderName, true)
.then((entries) => {
//Copy our asset/img/FreakyJolly.jpg to folder we created
this.file.copyFile(this.file.applicationDirectory + "www/assets/imgs/", imageName, ROOT_DIRECTORY + downloadFolderName + '//', imageName)
.then((entries) => {
//Common sharing event will open all available application to share
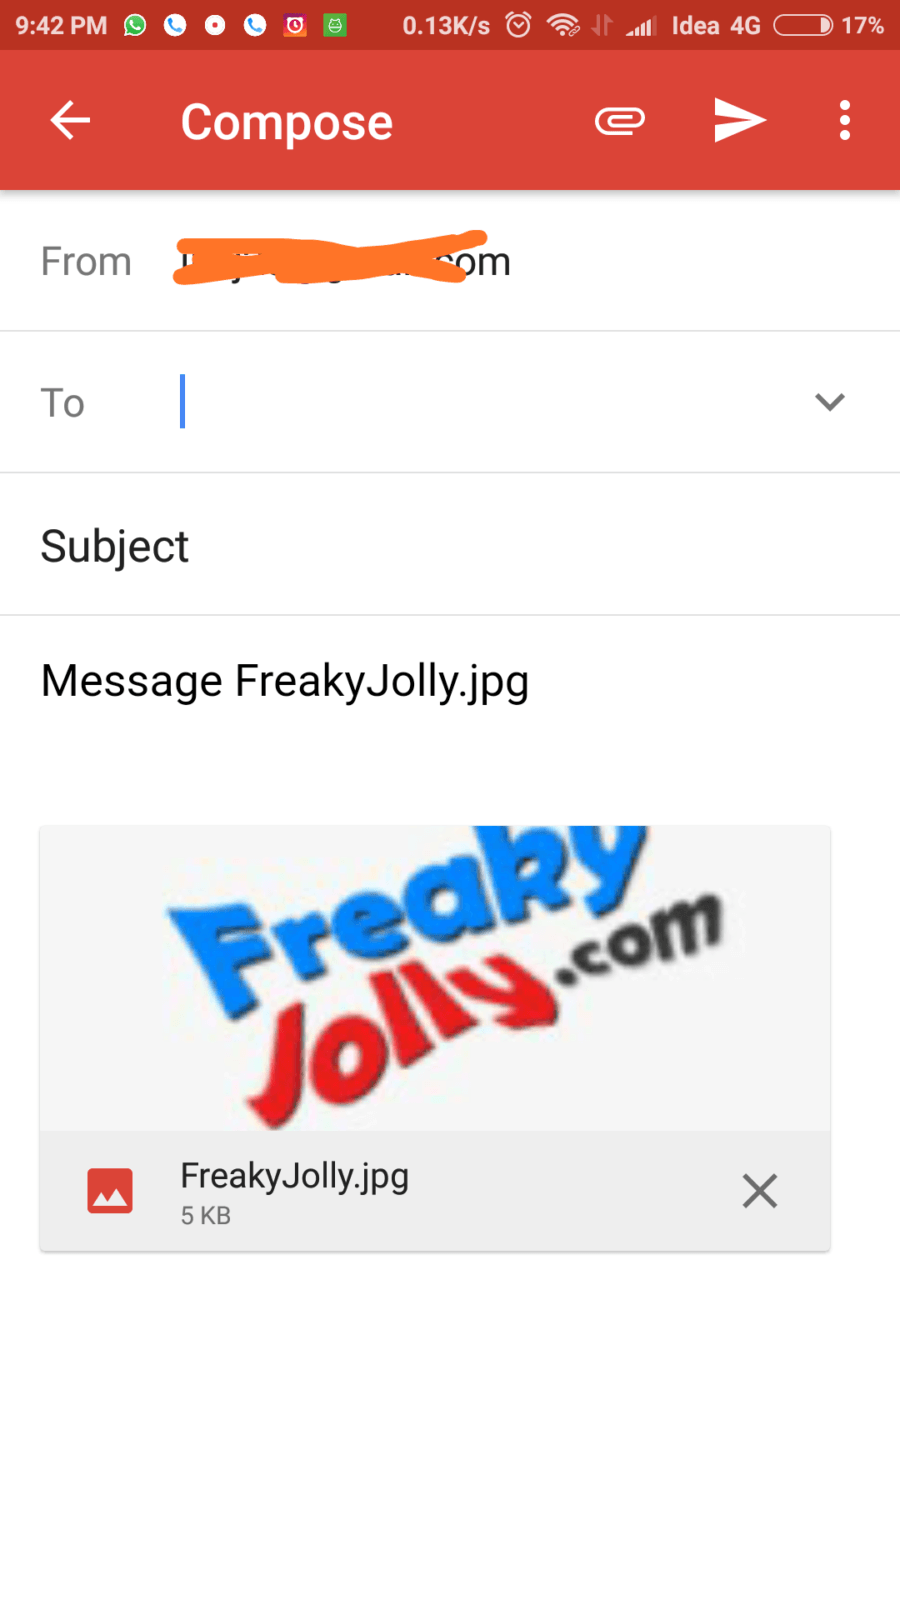
this.socialSharing.share("Message","Subject", ROOT_DIRECTORY + downloadFolderName + "/" + imageName, imageName)
.then((entries) => {
console.log('success ' + JSON.stringify(entries));
})
.catch((error) => {
alert('error ' + JSON.stringify(error));
});
})
.catch((error) => {
alert('error ' + JSON.stringify(error));
});
})
.catch((error) => {
alert('error ' + JSON.stringify(error));
});
}
}
I have added inline comments in events above, you can find other available functions on ionic native module’s documentation.
Now add “Android” platform for testing on real device
$ ionic cordova build android
Install apk file at “~saveNShareImage\platforms\android\app\build\outputs\apk\debug\app-debug.apk“.

Find Source Code of above PlayStore Application here
Let me know if you face any error or have any suggestions ![]()